


Blog

All Fruitland Park GMC Dealer Fruitland Park Buick Dealer About Buick GMC Used Vehicles GMC Trucks GMC Sierra Vehicle Features & Updates Phillips Buick GMC Phillips Buick GMC Service About GMC Buick Enclave Buick Envision Fruitland Park Used Cars GMC Terrain GMC Yukon Buick Encore GX Contests & Giveaways Fruitland Park Buick Service GMC Hummer EV SUVs Buick Envista Discounts GMC Acadia GMC Canyon Phillips Buick GMC Discount Staff Spotlight Trim Colors Vehicle Highlights & Features
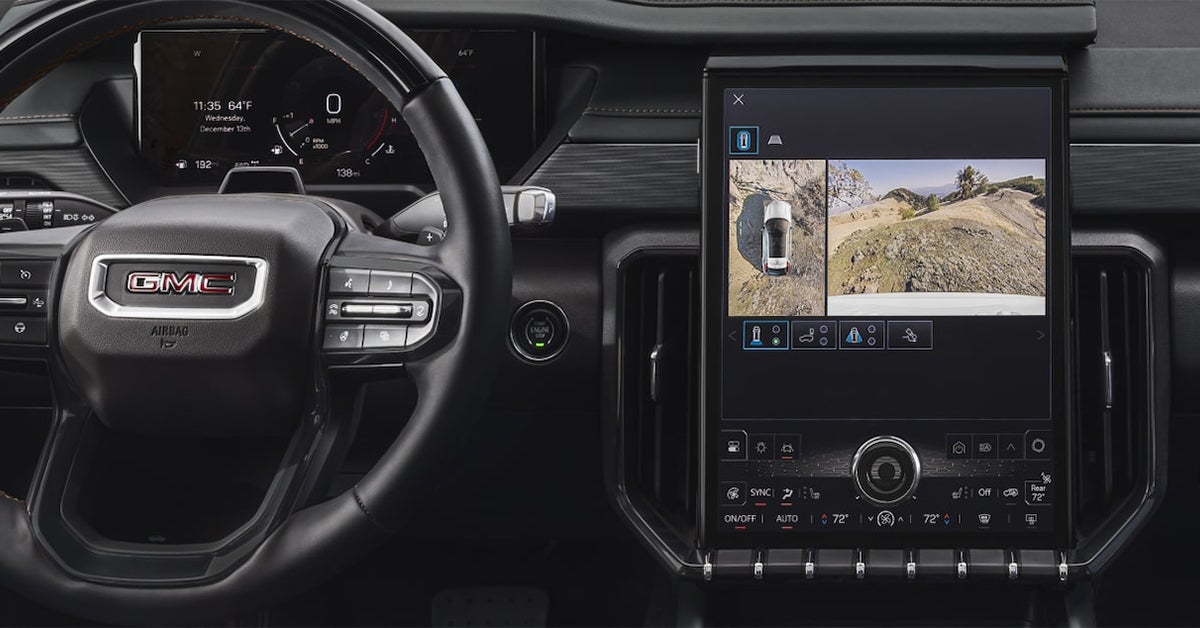
2025 GMC Acadia dashboard and steering wheel

How to Use Automatic Parking Assist in Your GMC

Parallel parking in a tight spot on a busy Orlando street or squeezing into a crowded Winter Garden shopping center can feel like a high-stakes game. But with the 2025 GMC lineup, including models like the Sierra 1500, Terrain, Acadia, and Sierra 2500, that stress is a thing of the past. Thanks to advanced GMC Automatic Parking Assist technology, your vehicle can help you steer into a space—hands-free. If you’ve ever wondered how to use park assist in your GMC or whether hands-free parking is really as seamless as it sounds, you’re in the right place. This step-by-step park assist tutorial will walk you through everything you need to know, from activation to parking like a pro. Whether you're navigating the streets of Claremont or backing into a tight spot in Groveland, GMC’s 2025 parking tech has your back. Want to try it for yourself? Visit or contact the team at Phillips Buick GMC to test drive one of our latest models and experience the future of GMC parking tech today. What Is GMC Automatic Parking Assist and How Does It Work? GMC Automatic Parking Assist is a smart driver-assist tool found in many 2025 models like the Sierra 1500, Terrain, Acadia, and Sierra 2500. It’s built to make parking faster, easier, and much less stressful. Whether you’re backing into a tight spot in Claremont or squeezing into parallel parking in Winter Garden, this feature helps your vehicle guide itself into place. This hands-free parking tool uses sensors placed around the car to “see” parking spots nearby. Once it finds a space, it helps steer the car into it, while you manage braking and gear shifts. How This 2025 GMC Parking Tech Works: Here’s a quick breakdown of what the system does once you turn it on: Scans for a spot: The system uses sensors at the front, rear, and sides to find a space large enough. Lets you know when it’s ready: You’ll hear a beep and see a message on your screen when a good spot is found. Guides you with prompts: Your screen tells you when to stop, shift gears, or let go of the wheel. Handles the steering: The vehicle steers itself while you manage the gas and brake. Confirms when the job is done: When the car is parked, you’ll get a message saying “Parking Complete.” This smart tool works for both parallel and perpendicular parking. You just press the Automatic Parking Assist button—usually marked with a "P" and two squares—on your dash or infotainment screen. Want to park on the left side? Just use your left turn signal before you start. Things to Remember While Using Park Assist: Always stay in the car and be ready to stop. The system won’t react to cars or people who move into the space last-minute. You may feel the seat vibrate if there’s a safety alert. If you're learning how to use park assist in a GMC, this tech can feel like magic—but it’s not automatic in every sense. You're still in charge of watching the screen, braking, and shifting. Think of it as a high-tech helper. Need a park assist tutorial in person? The team at Phillips Buick GMC is here to walk you through it. Come by and try this smart tech in a 2025 Sierra 1500 or Acadia to see how easy parking can be. How Do You Activate Automatic Parking Assist in a 2025 GMC? Turning on GMC Automatic Parking Assist is simple. Most 2025 GMC models—like the Sierra 1500, Terrain, Acadia, and Sierra 2500—include this feature if equipped. It's a smart way to take the stress out of parking. Once active, the system uses sensors and built-in software to help steer you into the spot. This tool is part of the latest 2025 GMC parking tech. While it can guide the wheel, you still control the brake and gears. This is not a full auto-drive system, but a real aid for tight spots. Steps to Activate Automatic Parking Assist Follow this easy park assist tutorial to turn the system on: Start the vehicle: Your GMC must be in drive and at low speed for the system to begin scanning. Press the Parking Assist button: This button looks like a letter P with lines and two small squares. It’s found on the dash or in the touchscreen. Pick a side Want to park on the right? Just press the button. Need the left side? Use the left turn signal before or during the scan. Watch for a message: Once a space is found, you’ll hear a beep and see a message telling you to stop. Follow screen prompts: Your screen will guide you step by step. It may say: Shift to reverse Remove hands from the wheel Brake or move forward Let the system steer: This is where hands-free parking kicks in. You guide the speed and shifting, and the car steers itself into the space. Finish the move: When done, a beep and “Parking Complete” message will show. Place the vehicle in park to end the process. Quick Tips for Best Use Keep your hands off the wheel when told. Stay alert and ready to brake. Keep sensors clean for better spot detection. This is one of the smartest tools in today’s lineup. Learning how to use park assist in a GMC takes just a few tries. After that, it becomes second nature. If you’d like to see this feature live, visit Phillips Buick GMC today. Our team can walk you through it in a Sierra 2500 or Terrain so you can test it out for yourself. How to Use GMC's Auto Parking Assist: Step-by-Step Step 1: Press the Automatic Parking Assist Button The first move in our park assist tutorial is simple. Locate and press the Automatic Parking Assist button. This activates your GMC automatic parking assist system in models like the Sierra 1500, Terrain, Acadia, and Sierra 2500. Button icon: A “P” with two small squares Button location: On the dash, near the climate controls Or in your infotainment system’s parking menu When you press the button: The system powers on its sensors. 2025 GMC parking tech begins scanning for spaces. You’ll see a prompt on the instrument cluster or center screen. Once the button is pressed, you’re ready for the next step in hands-free parking GMC. Step 2: Use Turn Signal or Infotainment Screen to Select Parking Side Once the system is on, you need to choose which side to park on. This step helps guide your GMC’s sensors. There are two ways to pick your side: Use the turn signal Left blinker tells the system to search on the left Right blinker tells it to scan on the right Use the infotainment screen Tap the screen if no blinker is used You’ll see side options once a space is found This is a key part of the GMC automatic parking assist system. It helps your vehicle, whether it’s a Terrain, Acadia, or Sierra 1500, know where to focus. The 2025 GMC parking tech looks for a space that fits your car based on the side you choose. Want to know how to use park assist GMC models like a pro? It all starts with simple steps like this. And once your side is set, the hands-free parking GMC system takes care of the rest. Step 3: Wait for System to Detect a Space (Listen for Beep, Check Screen) After you pick the side, let the system scan. Your GMC will now look for a space that fits your car. You don’t need to steer or brake. Just drive slow—under 18 mph. Here’s what to watch and listen for: Listen for the beep One beep means it found a spot It will sound once the space is large enough Watch the screen The dash or infotainment screen will show a prompt It may ask you to shift into reverse This part of the process is smooth and quick. The 2025 GMC parking tech works with sensors placed around the body of your car. It checks for space on the side you picked. This applies across many models, including the Sierra 1500, Sierra 2500, Acadia, and Terrain. With this park assist tutorial, you can see how the GMC automatic parking assist takes the guesswork out of tight spots. Looking to master how to use park assist GMC systems offer? This step is where the hands-free parking GMC feature starts to shine. Let the tech do the work while you stay in control. Step 4: Follow Prompts to Shift into Reverse and Release Steering Once your GMC finds a spot, it’s time to take the next step. You’ll see a prompt on your screen. This will tell you to shift into reverse. Here’s what to do: Check the dash or infotainment screen The system will tell you when it’s time to shift Look for a clear prompt with the word “Reverse” Shift your gear Move the gear to “R” when told Keep your foot on the brake until you’re ready Let go of the wheel Do not steer The system will take over and begin the move This is where the GMC automatic parking assist really shows its strength. The wheel will turn by itself. You’ll still stay in charge of braking and shifting. The 2025 GMC parking tech uses built-in cameras and sensors to guide your vehicle into place. Whether you're in the Sierra 1500, Sierra 2500, Acadia, or Terrain, the process stays the same. This hands-free parking GMC feature is part of a smart driver aid setup. It’s built to help you park with ease and care. If you’re looking for a clear park assist tutorial or want to know how to use park assist GMC systems, this step is key. Sit back, stay alert, and let your GMC do the hard part. Step 5: Follow Screen and Beep Prompts During Maneuver Once you’ve shifted into reverse and let go of the wheel, your GMC takes over the steering. But you still play a key role. Your job is to follow the prompts from the system while it moves the car into place. Here’s how to stay in control while your vehicle parks: Watch the screen Your screen shows clear steps You’ll see arrows, shift cues, and alerts Listen for beeps Slow beeps mean you’re close to a curb or car Fast beeps mean stop now Use the brake You control the speed Press lightly to stay smooth Stop if the system tells you to Shift when told The screen will guide you If needed, shift from reverse to drive, then back The 2025 GMC parking tech does the steering. But you guide the move with your foot and your focus. Whether you’re driving a Sierra 1500, Terrain, Acadia, or Sierra 2500, this step stays the same. This feature is part of hands-free parking GMC systems. It helps ease stress and boost safety in tight spots. If you’re learning how to use park assist GMC models, this step is part of every park assist tutorial. Be alert, take it slow, and let your GMC do the work. Step 6: System Will Indicate When Parking Is Complete Once the parking move is done, your vehicle will let you know. You don’t need to guess. The system uses clear signals to tell you it’s safe to stop. Here’s what to watch and listen for: Screen Message A message will appear that says the park is done You may see “Parking Complete” or something similar Sound Cue A soft chime or beep will play This tells you to place the car in park Steering Control Returns You now take back full control of the wheel Hands-free mode is over This is the last step in the GMC automatic parking assist process. Once the vehicle tells you it's done, shift into park and exit as usual. Whether you're using the system in a Sierra 1500, Terrain, Acadia, or Sierra 2500, it works the same. The 2025 GMC parking tech was made for ease and trust. If you're new and learning how to use park assist GMC models, this step shows you when the job is done. That’s the end of the park assist tutorial — simple, safe, and smooth. With hands-free parking GMC systems, your ride parks with ease, and you always know when it’s complete. Safety Tips For Using Park Assist in Your GMC The GMC automatic parking assist feature makes it easy to park. But even smart tech needs smart use. Keep these tips in mind to stay safe while using the system. 1. Always Stay Alert Park assist is a helpful tool. But it does not replace your eyes or mind. Look around your vehicle before and during parking Watch for people, pets, or objects that move fast Don’t rely only on screens or sounds 2. Know When to Take Over If something does not feel right, take control. Grab the wheel if the system seems off Press the brake to stop if needed Never ignore your instincts 3. Check the Area First Before you start, make sure the spot is safe and legal. Make sure there is space on both sides Avoid spots that are too small or on a slope Don't use park assist in tight traffic or poor weather 4. Listen and Look The system will give you beeps and on-screen notes. Read every prompt on your screen Listen for alert sounds as you mov Stop if you hear fast beeps or warnings 5. Use It Only When You Are Ready Make sure you have time and space. Don’t rush the system Take your time to follow each prompt Only use it in calm settings at first This is true whether you drive a Sierra 1500, Terrain, Acadia, or Sierra 2500. Every model with 2025 GMC parking tech gives you tools, but your focus is still key. Learning how to use park assist GMC models is easy with the right steps and care. A park assist tutorial helps, but safe use is up to you. Hands-free parking GMC systems add ease, not autopilot. Use it right. Stay alert. Park safe. Which GMC models offer automatic parking assist? Automatic parking assist is available on select trims of the GMC Sierra 1500, Sierra 2500, Terrain, and Acadia. How do I activate parking assist in my GMC? To activate the system, press the park assist button on the center console, then use your turn signal or screen to pick a side. What sensors and cameras are used by the system? The system uses ultrasonic sensors and a surround-view camera system to detect spaces and guide the vehicle. Can I override or cancel park assist mid-maneuver? Yes. You can stop the process at any time by grabbing the wheel, pressing the brake, or disabling the feature manually. Are there safety precautions I should follow when using it? Yes. Always stay alert, watch your surroundings, and be ready to take control if needed. Explore Advanced GMC Technology with Phillips Buick GMC Learning how to use your vehicle’s park assist helps you feel more at ease every time you park. Whether you drive in a tight lot or a busy street, the right tools can make all the difference. Drivers near Orlando, Clermont, Winter Garden, and Groveland are welcome to visit Phillips Buick GMC. We offer a full lineup of vehicles, including the Sierra 1500, Sierra 2500, Terrain, and Acadia. Our staff is here to help you get to know the features that come with today’s smart parking tools. Looking to learn even more? Take a look at how to care for your vehicle between service visits. For example, many drivers want to know more about: How to rotate the tires on your 2025 GMC Hummer EV SUV How to keep tire wear even on your 2025 Buick Envista The best way to rotate tires on your 2025 Buick Envision You’ll also find helpful tips on other features that help your GMC park with ease—just follow the anchor text to explore more. When you’re ready to find your next GMC, browse our full selection of new GMC models here. We look forward to helping you drive with more ease, more tech, and more confidence. Disclaimer: All information is provided for general informational and entertainment purposes only. While we strive for accuracy, we cannot guarantee that all content is complete, current, or error-free. Any reliance you place on such information is strictly at your own risk. This article may include opinions and is not endorsed by, or officially affiliated with, any vehicle manufacturer or brand. Always consult official sources – such as the vehicle’s owner’s manual, authorized dealerships, or certified professionals – for the most up-to-date and personalized information.

Car salesman showing a vehicle off to a customer who is smiling

Can You Get an Allodial Car Title in 2025?

When you buy a car, you expect to own it—but what if there were a way to take that ownership a step further? Enter the allodial car title: the rare, sought-after form of ownership that puts you in complete control. Unlike traditional car titles, an allodial title offers freedom from claims, taxes, and third-party interference. It’s the ultimate statement of true vehicle ownership. If you're shopping for a new vehicle in the Orlando, Clermont, Winter Garden, or Groveland areas—whether it's a rugged GMC Sierra 1500, a stylish Buick Envision, the nimble Envista, or the family-ready Acadia—understanding how to get an allodial car title could transform how you think about your next car purchase. This guide breaks down the buying car allodial process, explains the allodial title steps, and shows you how to protect your investment from the start. At Phillips Buick GMC, we believe in helping drivers make smart, informed decisions. Visit or contact us today to explore your vehicle options and learn more about obtaining an allodial car title in 2025. What's the Process for Getting an Allodial Car Title? Step 1: Buy the Vehicle Free and Clear from a Reputable Dealer The first step to obtain an allodial car title is to buy your vehicle outright. This means no loans. No liens. No third-party claims. You must be the full owner from day one. This is key in the allodial title steps. If the car is not fully paid for, it cannot qualify for this type of title. A lender’s name on the paperwork blocks the car purchase ownership path you’ll need to follow. When looking for a new vehicle, work with a trusted dealer. A reputable dealer will give you a clean sale. At Phillips Buick GMC, we help you start the car buying process the right way. Popular models you may consider include: GMC Sierra 1500 – Strong build, full power, and a bold look Buick Envision – Sleek style and smart safety features Buick Envista – A smooth, compact ride built for the city GMC Acadia – Great for families, with lots of room and tech No matter which model you choose, make sure the sale is free and clear. That means: You pay in full at the time of purchase The dealer gives you the full title with no liens You receive all documents in your name only Buying from a well-known dealer also makes it easier to prove ownership later. This is often needed if you want to learn how to get allodial title at your local DMV or through legal channels. In summary: What You Need Why It Matters Pay in full Needed for full ownership No lender or lien listed Required for allodial title process Buy from trusted dealer Helps avoid legal or title issues later Start smart. Choose a clean, clear sale. That’s how you build a strong base for the full allodial car title process. Step 2: Pay Off Any Existing Loans and Remove All Liens If you did not buy the car in full, this step is a must. To move forward with the allodial title steps, the car must be free from all liens. That means you must pay off any loans tied to the vehicle. You don’t own your car fully until all debts are cleared. Even if the car is in your name, a lender still has a legal claim if you owe money. That claim is called a lien. It blocks your ability to seek full rights through the buying car allodial process. Many owners of popular models—like the GMC Sierra 1500, Buick Envision, Buick Envista, or GMC Acadia—often finance their cars. That’s fine at first, but if you want full, private rights, you’ll need to close the loan. Here’s how to take this step: How to Remove a Lien Contact the lender – Ask for your payoff amount and how to submit it. Pay the full balance – Use certified funds to avoid delays. Get a lien release – Once the loan is paid, your lender must send you a lien release letter. Visit your DMV – Submit the lien release to update your car’s title. Once you’ve done this, the car becomes fully yours. You now hold the full car purchase ownership. This puts you one step closer to learning how to get allodial title for your vehicle. Step 3: Secure Physical Possession of the Vehicle Title Once your loan is paid and all liens are cleared, it’s time to get the title in hand. This step is simple, but it matters a lot. You can’t complete the allodial title steps without the physical title. It proves you are the full legal owner. If you're asking how to get allodial title, this is where it starts to feel real. The paper title shows that no one else can claim your car. You now have full car purchase ownership. Some buyers of the Sierra 1500, Buick Envision, Envista, or Acadia may think a digital record is enough. It’s not. For the buying car allodial process, a physical title is key. Where to Get the Physical Title From the DMV – Once the lien is removed, request your paper title from the state. From the dealer – If you paid in full when you bought the car, they may have the title on file. From your lender – If you financed and then paid off the loan, they should send it by mail. Make sure your name is listed as the sole owner. No other party should be on the document. Double-Check the Title: Item to Verify Why It Matters Name matches your ID Proves your legal ownership No lienholders listed Confirms all debts are cleared Paper copy in your possession Needed for future title updates Securing the title is one of the most important allodial title steps. It gives you the proof you need to obtain allodial car title rights down the road. Without it, the rest of the process can't move forward. This is the moment when your car purchase ownership becomes complete. Step 4: File a Legal Affidavit of Ownership (Optional but Recommended) Once you hold the title in your name, the next step is to make it known. Filing a legal affidavit of ownership helps with that. While this part is not required in all states, it is smart to do. If you're working through the buying car allodial process, this extra step shows clear and full car purchase ownership. It's a written, sworn record that you are the sole owner of the car. This is especially useful if you're planning to obtain allodial car title status later. What Is an Affidavit of Ownership? An affidavit of ownership is a sworn document. It says that you are the full, legal owner of your car. It adds one more layer of proof. People who want to know how to get allodial title often miss this part. But it helps you build a strong case if you need to go to court or deal with state agencies later. This applies whether you own a Sierra 1500, Buick Envision, Envista, or Acadia. What the Affidavit Should Include: Full legal name and address of the owner Make, model, and year of the vehicle Vehicle Identification Number (VIN) Statement declaring full ownership Signature and notarization Affidavit of Ownership Why It's Helpful Legal record Adds strength to your title claim Clear ownership Shows no one else has rights Easier legal filing Helps with future title steps If you're following all the right allodial title steps, this document can only help. It costs little and adds peace of mind. It also shows that you are serious about true car purchase ownership. You’ve worked hard to buy your car free and clear. Now, take the extra step to make that fact known—on paper and under oath. Step 5: Consider a Trust or Private Ownership Entity To go even further in the allodial title steps, some owners choose to place the car in a trust or private entity. This helps keep their name off public records. It can also protect the car from legal or tax claims. If you're exploring the buying car allodial process, a trust may offer peace of mind. It gives you more control over how your car is managed, taxed, or passed on. Let’s say you’ve paid for your Buick Envision, Envista, Acadia, or Sierra 1500 in full. You hold the title. Now, this step may help you lock in your rights even more. Why Use a Trust or Private Entity? There are many reasons to take this route, including: Privacy: Keeps your name out of public title searches. Asset protection: Shields your car from lawsuits or debts. Estate planning: Makes passing on the car smoother. Legal strength: Builds a stronger case when you want to obtain allodial car title. Ownership Method Benefits Personal ownership Simple, direct control Trust or entity ownership Privacy, protection, long-term use What You Need to Set It Up: A trust agreement or business setup (LLC, for example) A change in the name on the car title Legal guidance from a lawyer or title specialist If you’re serious about how to get allodial title, this step adds a layer of support. It may not be for everyone. But if you want long-term car purchase ownership security, it’s worth a closer look. Adding a trust or entity to the process makes your ownership harder to challenge. It’s one more smart move in your journey toward full and private car rights. Can you secure an allodial title when purchasing a used vehicle? Yes, but only if the vehicle is fully paid for and has no liens or loans attached. Do allodial car titles work in 2025? Consult a lawyer for specific details regarding your individual situation. In most states allodial car titles are no longer a valid form of ownership. Always check local laws and regulations for details. What paperwork is required for an allodial car title? You typically need a clear vehicle title, bill of sale, lien release (if applicable), and a notarized affidavit of ownership. How long does the allodial title process take? The process can take several weeks to a few months, depending on your location and legal requirements. Do I need a lawyer or title specialist? No, but having a lawyer or title specialist can help ensure proper filing and reduce the chance of errors. Will an allodial title affect my financing options? Yes, because an allodial title requires full ownership. Vehicles under financing or lease agreements are not eligible. Take the Next Step Toward Full Vehicle Ownership Today If you're ready to take the next step in full vehicle ownership, our team at Phillips Buick GMC is here to help. We know the title process can seem complex, but you're not alone. Whether you're buying new or used, we’re happy to walk you through every step. Drivers from Orlando, Clermont, Winter Garden, and Groveland are invited to explore our wide range of vehicles. From the Sierra 1500 to the Buick Envision, Envista, and Acadia, we offer strong, reliable options for every lifestyle. You can check out our current finance options online to get started today. Want to keep your vehicle running at its best? We have helpful tips on how to rotate your tires for models like the 2025 GMC Terrain, 2025 GMC Yukon, and the 2025 GMC Sierra EV. Learning how to perform regular tire care on your GMC helps keep your ride smooth and your tires safe for the road. If you're interested in learning more about how to obtain full title ownership of your next vehicle, feel free to reach out. Our team is ready to answer your questions and help you find the right fit. We look forward to serving you at Phillips Buick GMC. Disclaimer: All information is provided for general informational and entertainment purposes only. While we strive for accuracy, we cannot guarantee that all content is complete, current, or error-free. Any reliance you place on such information is strictly at your own risk. This article may include opinions and is not endorsed by, or officially affiliated with, any vehicle manufacturer or brand. Always consult official sources – such as the vehicle’s owner’s manual, authorized dealerships, or certified professionals – for the most up-to-date and personalized information.

car salesman shaking hands with a client

What is an Allodial Car Title & How Does it Work?

Ever heard the term “allodial car title” and wondered if it’s the key to owning your vehicle free and clear—no strings attached? You’re not alone. With questions about car title rights, 2025 vehicle ownership law, and allodial vs lien title swirling online, it’s easy to get caught up in the confusion. While the phrase might sound like a legal loophole or secret ownership hack, the truth behind allodial car titles might surprise you. In this guide, we’re breaking down allodial car title explained—what it really means, where it comes from, how it compares to traditional vehicle titles, and why it’s often misunderstood. Whether you're shopping for a powerful GMC Sierra 1500 to tow your next big adventure or looking to cruise Claremont or Winter Garden in a refined Buick Envision or Envista, understanding how vehicle titles work is essential. If you’re curious about what truly defines ownership in today’s automotive world—or you're navigating title laws while buying a new or used vehicle—Phillips Buick GMC is here to help. Contact our knowledgeable team or stop by our dealership near Orlando and Groveland to get straightforward answers and expert guidance on every step of your ownership journey. Service Department Get Directions Contact Us What Is an Allodial Car Title? The term allodial car title has been gaining attention. It sounds official, even powerful. But what does it really mean? And how does it fit into today’s world of vehicle ownership laws? Let’s start with the basics. Allodial Car Title Explained An allodial title is a legal term from land law. It means full ownership with no duties owed to anyone—no taxes, no liens, and no claims from lenders or the state. In theory, this would apply to a car as well. When people search for what is an allodial title, they’re often hoping for a way to own their car outright. No lender, no bank, no government claim. Just the owner and the vehicle. But here’s the truth: Allodial titles do not apply to cars in the way people often think. Are Allodial Car Titles Still Relevant in 2025? More people are asking about car title rights due to rising auto loan rates and growing interest in financial freedom. A wave of online posts claim that you can “convert” your title to allodial status. These claims often lack real legal support. As of 2025, no state DMV offers allodial car titles as part of its official process. The idea remains more theory than practice. Still, it’s sparked a debate about what true ownership looks like. Allodial vs Lien Title To help explain the difference, here’s a quick comparison: Feature Allodial Title Lien Title Ownership Full, with no outside claim Shared until the loan is paid Debt None Loan or lease held by lender Legal Support (2025) Not recognized for vehicles Standard title process in all states DMV Registration Not available Required for all drivers If you finance your Sierra 1500, Buick Envision, or Envista, your title will include a lien. That means the lender is a co-owner until your final payment. The same is true if you’re leasing or financing an Acadia. What You Can Do Instead If you’re seeking more control, consider these steps: Pay off your loan early Choose vehicles with strong value retention like the Sierra 1500 or Buick Envision Keep your title clean by avoiding unpaid fees or insurance lapses Work with a trusted dealer like Phillips Buick GMC for honest advice Understanding your vehicle title is key to making smart decisions. Want to know where you stand with your current title? Visit Phillips Buick GMC and let our team walk you through the details. Cna Florida Drivers get an Allodial Car Title? The idea of owning your car with no strings attached sounds great. That’s where the term allodial car title comes in. It promises full rights, no liens, and no legal claims by others. But is this title real, and can you get one in Florida? What Is an Allodial Title? In simple terms, an allodial title means total ownership. With land, this means no rent, no tax, and no one else has a claim. Some say you can apply this to cars. The claim is that once you have an allodial car title, no lender or state has power over your vehicle. But this idea doesn’t hold up under current law. Can You Get an Allodial Car Title in Florida? Florida, like most other state in 2025, does not issue allodial car titles. The state only gives out standard titles, either: Clear – no loan on the car Lien – loan not paid off yet If you have a loan on your Acadia, Sierra 1500, or Buick Envision, your title will show a lien. Even after you pay off the loan, the state will only issue a regular title, not an allodial one. Florida law still follows the 2025 vehicle ownership law standards used in most U.S. states. No law allows for a private car to have full allodial status. Allodial vs. Lien Title: Key Differences Let’s break it down in a clear table: Type of Title Who Owns the Car? In Use in Florida? Notes Allodial Title The person alone No Not supported by law for vehicles Lien Title Lender until paid Yes Most common if the car is financed Clear (Regular) Title The person alone Yes Given after loan is paid So if you buy a Buick Envista or Acadia with a loan, the bank will be listed on the title. That’s normal. Once the loan is paid, you’ll get a clear title. But it will not be allodial. What About Car Title Rights? You still have car title rights even if your title isn’t allodial. Here’s what you can do: Sell or trade your car if it’s paid off Transfer your title when needed Keep your title clear of liens with full payments Use your title as proof of ownership The idea of an allodial car title may sound appealing. But for now, it’s not a real option in Florida. Need help with a title or want to explore your trade-in options? The team at Phillips Buick GMC is ready to help. Stop by or give us a call to learn more about your rights as a car owner. How Does a Traditional Car Title Work in Florida? In Florida, the car title is a legal paper that proves you own your car. It includes your name, the car’s VIN, and any loan details. If you drive a Sierra 1500, Acadia, Buick Envision, or Envista, your car title works the same way as any other in the state. Key Parts of a Florida Car Title Your Florida title will show: The owner’s full name and address The Vehicle Identification Number (VIN) The make, model, and year If there’s a lien or loan on the car The name of the lienholder, if any If you own your car free and clear, no lien will be listed. Lien vs. Clear Title When you finance a car, your lender is the lienholder. You do not fully own the car until the loan is paid. Once the balance is paid, the lien is removed. Then, the state sends you a clear title. Here’s a quick look at the differences: Title Type You Own It? Lender Listed? Can You Sell It? Lien Title Not Yet Yes No, unless lender agrees Clear Title Yes No Yes, you can sell it This system is backed by Florida’s 2025 vehicle ownership law. It protects both the buyer and the lender. Allodial Title vs. Traditional Title Many people are asking, what is an allodial title? or can I get one for my car? As explained in the section above, allodial car title laws do not apply to vehicles in Florida. Some folks compare an allodial vs lien title, hoping to avoid loans or state control. But the truth is simple: all car titles in Florida are managed through the state. You can’t hold a car without registering it. You also can’t bypass the lien system if you finance a car. What Are Your Car Title Rights? Even if you have a loan, you still have rights: You can use the car You can pay off your loan early You can request a copy of your title You can sell the car if the lender agrees Once the loan is paid in full, the title becomes yours alone. If you're unsure how your title works, or if you're looking to upgrade to a new model, Phillips Buick GMC is happy to help. Visit us for clear answers, honest help, and a team that knows Florida car laws inside and out. Allodial vs. Lien Title: What’s the Real Difference? A lot of people in 2025 are asking the same thing: what is an allodial title and can it be used for cars? The idea sounds simple. Full ownership, no debt, no state ties. But when it comes to vehicles like the Sierra 1500, Acadia, or Buick Envision, the truth is more complex. Feature Allodial Title Lien Title State Involvement None (in theory) Yes, required Loan or Debt Attached No Yes, until paid Recognized in Florida? No Yes Car Title Rights Full (unverified) Full after lien is paid Based on 2025 Law? Not supported Fully supported The Bottom Line Under 2025 vehicle ownership law, only lien-based and state-managed titles are valid for cars in Florida. There is no path to register a Buick Envision, Envista, Sierra 1500, or Acadia under an allodial title. It may sound appealing, but legally, it’s not real for vehicle use. Want to know more about how your car title works? Or ready to get into a new ride without confusion? Stop by Phillips Buick GMC. We’ll help clear things up and make the next step easy. Why You Can’t Have an Allodial Title for Your Car in 2025 Some people ask if they can get an allodial title for their car. Others may have read about it online. But in 2025, this idea is not real for vehicles. What Is an Allodial Title? At its core, an allodial title means total control. No taxes. No liens. No rules from the state. People once used this for land. Not cars. But that does not mean it applies to your car in Florida or any other state. Why It Doesn’t Work for Vehicles Cars are not the same as land. Every car has to meet state rules. That includes: Taxes Fees Tags Titles Proof of ownership Even if your Sierra 1500 is paid off, the state still controls your car title rights. You cannot file a form or pay a fee to “make it allodial.” The state won’t accept it. What 2025 Vehicle Ownership Law Says As of 2025, Florida law makes this clear: All vehicles must have a title issued by the state A lien title is used if you have a loan A clear title is used if you own the car You can’t remove your car from the state system. That means no real allodial title. Allodial vs. Lien Title Recap To make it easy, here’s a side-by-side: Feature Allodial Title (Claim) Lien Title (Real) Ownership Level Total (no rules) Shared with lender Used with Cars? No Yes Backed by Law in 2025? No ​​Yes Car Title Rights Protected? Not valid Yes Works for Buick or GMC? No Yes So even if your Acadia, Envision, or Envista is paid off, it still needs to follow the law. There is no path to full allodial ownership for your car. If you want real answers on titles, trade-ins, or how to register a new vehicle, stop by Phillips Buick GMC. We’re here to make things easy, clear, and legal. What is an allodial car title? An allodial car title is a claim of full vehicle ownership with no state control, taxes, or liens, but it is not legally valid for vehicles in any U.S. state. How does an allodial title differ from a standard lien title? A standard lien title shows a lender has financial interest in the vehicle. An allodial title claims the owner has full control without state or lender involvement, which is not legally recognized for cars. What rights does an allodial title grant the owner? In theory, it would grant full ownership with no state control. In practice, it grants no legal rights for vehicle owners. Are allodial titles recognized in every state? No, allodial titles are not recognized for cars in any U.S. state, including Florida. What costs or fees are associated with obtaining one? There are no official costs or legal methods to obtain an allodial title for a vehicle. Any service offering this is not backed by law. Get Your Car's Title & Ownership Finalized at Phillips Buick GMC Understanding your car title is key to making smart choices. It helps you avoid scams and know your rights. If you're still unsure about title terms or what’s real in 2025, our team at Phillips Buick GMC is ready to help. We welcome drivers from Orlando, Claremont, Winter Garden, and Groveland to stop by. Our lot is full of great new and used cars and trucks. Take a look at options like the Sierra 1500, Buick Envision, Envista, and Acadia. There’s something for every need and style. If you're thinking about buying or trading in, we can help you learn more about your finance options here: Phillips Buick GMC Finance Center While you're on our site, check out tips on how to handle real issues with your vehicle. Learn more about how to fix oxidation on your car, adjust car seat straps, or even rotate the tires on your GMC Acadia at home. For more help with understanding your car title rights in 2025, start by visiting our team or giving us a call today. We’re here to help make each part of car ownership easier. Disclaimer: All information is provided for general informational and entertainment purposes only. While we strive for accuracy, we cannot guarantee that all content is complete, current, or error-free. Any reliance you place on such information is strictly at your own risk. This article may include opinions and is not endorsed by, or officially affiliated with, any vehicle manufacturer or brand. Always consult official sources – such as the vehicle’s owner’s manual, authorized dealerships, or certified professionals – for the most up-to-date and personalized information. Get Directions to Phillips Buick GMC Disclaimer: All information is provided for general informational and entertainment purposes only. While we strive for accuracy, we cannot guarantee that all content is complete, current, or error-free. Any reliance you place on such information is strictly at your own risk. This article may include opinions and is not endorsed by, or officially affiliated with, any vehicle manufacturer or brand. Always consult official sources – such as the vehicle’s owner’s manual, authorized dealerships, or certified professionals – for the most up-to-date and personalized information.
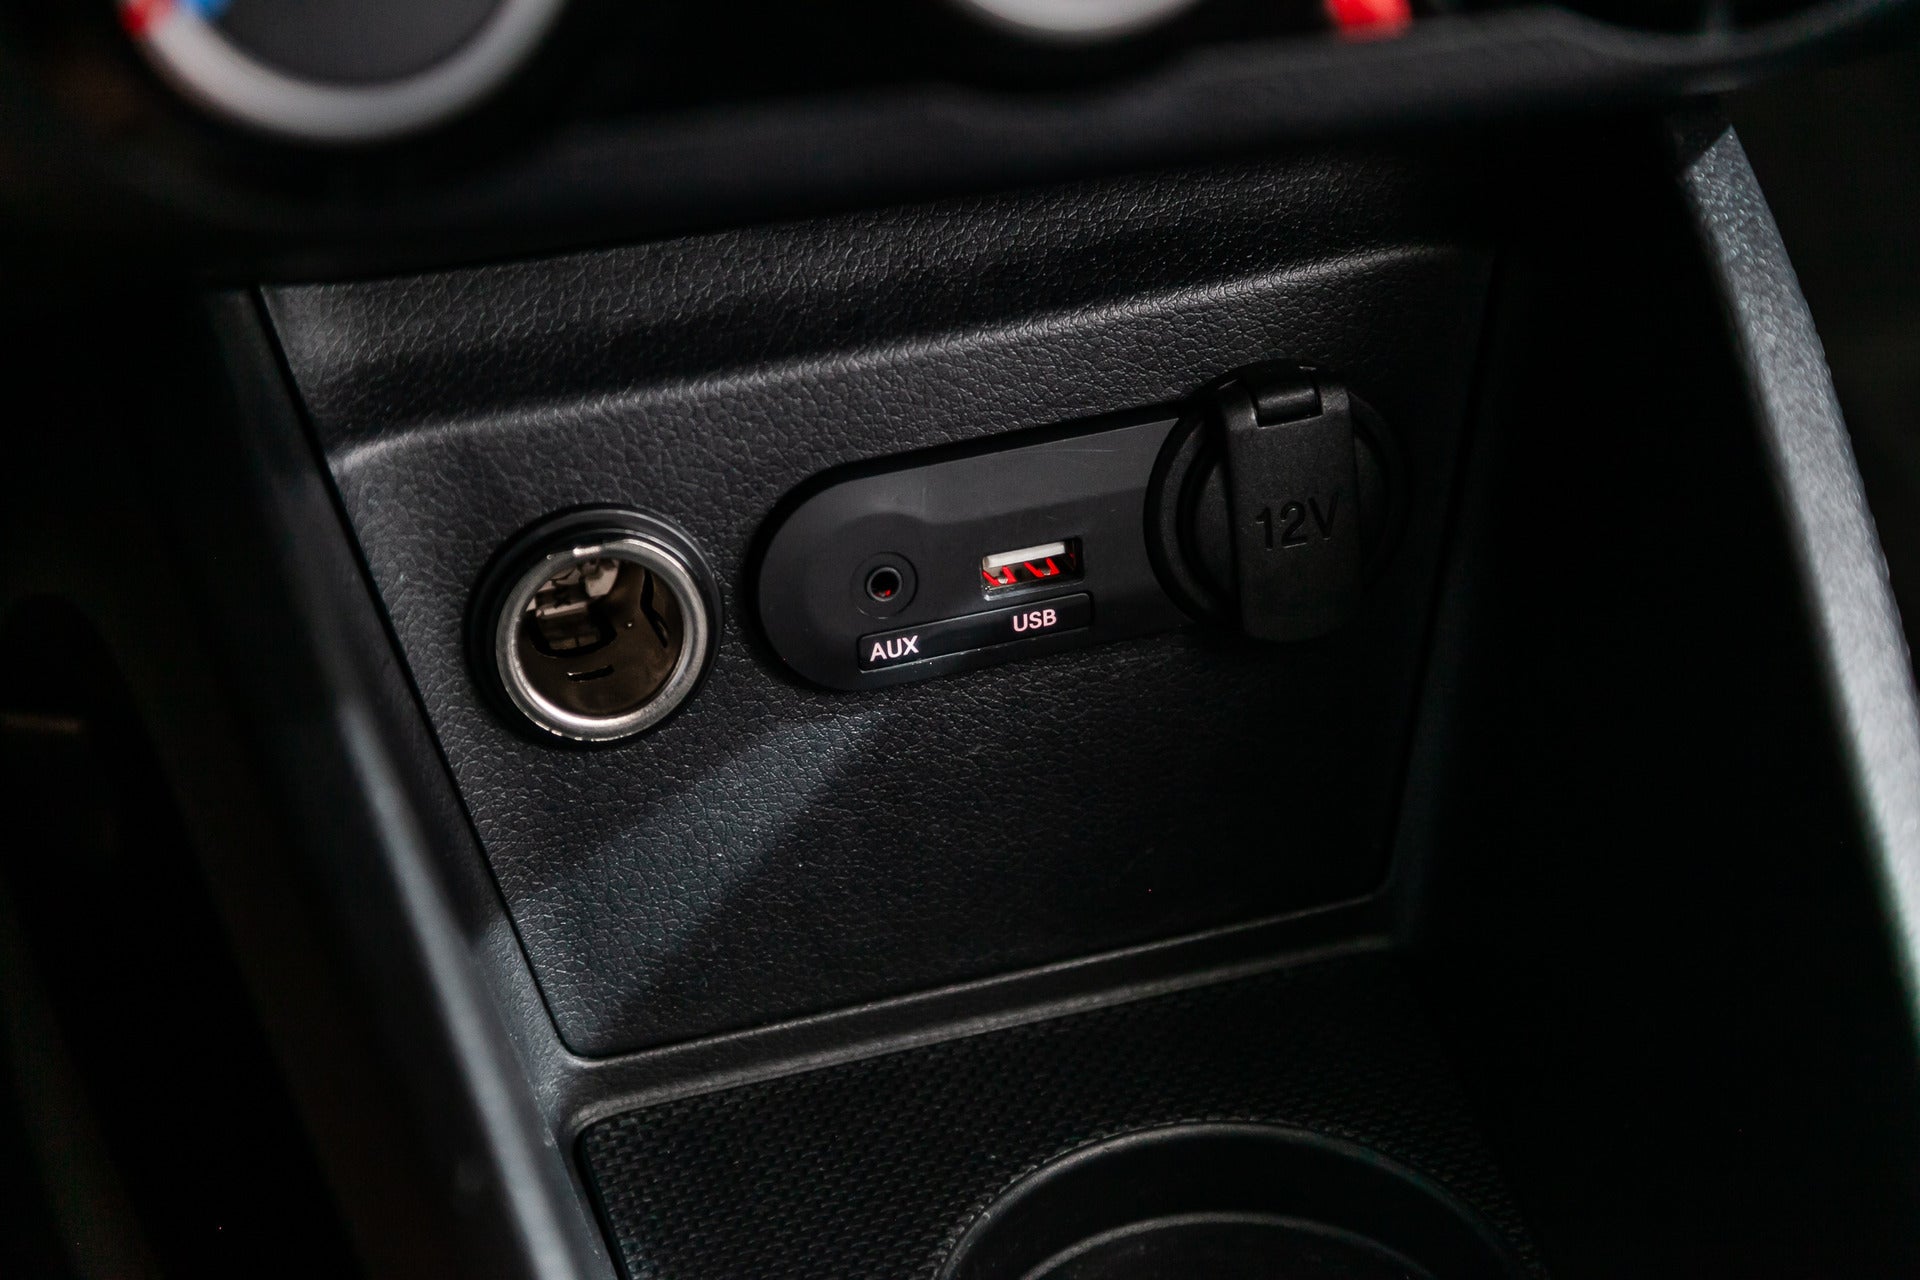
Car Cigarette lighter with USB port and aux port nearby

How to Fix a Car's Broken Power Outlet or Cigarette Lighter

Is your car’s power outlet not working when you need it most? Whether you’re trying to charge your phone, power a GPS, or plug in a portable vacuum, a malfunctioning power outlet can be a frustrating setback. Thankfully, fixing a car power outlet isn’t as complicated as it may seem. From checking for simple obstructions to inspecting the fuse and wiring, there are a few steps you can take to get your outlet back in action. In this guide, we’ll walk you through the process and offer some useful tips to help you troubleshoot the issue in your Buick Enclave, GMC Sierra 1500, or other vehicle models. If the problem persists or you’re not comfortable handling the repair yourself, the experts at Phillips Buick GMC in Orlando are here to assist. Let’s dive into the steps to fix your car’s power outlet and get you back on the road with a fully functional accessory port! Schedule Service Get Directions Contact Us Step 1: Check for Obstructions in the Socket When your car’s power outlet isn’t working, one of the first things you should check for is any obstruction inside the socket. Over time, small items like coins, food, or debris can make their way into the outlet and prevent a proper connection. This can cause your car cigarette lighter to stop working or interfere with your ability to power devices. Here’s how to check and clean your power outlet: Inspect the Socket Look inside the outlet for any visible objects. Common culprits include: Coins Small toys or objects Crumbs or food particles Remove Debris If you find anything blocking the socket, carefully remove it. A pair of tweezers or a small vacuum cleaner may help get rid of debris without damaging the outlet. Check the Center Pin In many vehicles, such as the GMC Sierra 1500 or Buick Enclave, the metal pin in the center of the socket connects to your device. Ensure there’s nothing blocking or preventing this pin from making contact. If you find an obstruction and remove it, the outlet should work again. However, if it’s still not functioning, it could indicate a deeper issue with the wiring or fuse. If the issue persists, and you’re driving a vehicle like the Buick Envision or GMC Acadia, it might be time to move on to the next troubleshooting steps to repair the power socket. But don’t worry; there are simple fixes that can restore your car’s accessory port functionality. Step 2: Test the Power and Ground Connections If your car’s outlet still doesn’t work after checking for debris, the next step is to test the power and ground. These two parts help send and complete the flow of power. If one fails, the socket won’t work at all. This step is key when your car cigarette lighter is not working or if you’re trying to fix a power outlet in a model like the Acadia, Enclave, or Sierra 1500. You’ll need a few tools: 12V test light or a digital multimeter A clean ground point Basic hand tools (like a screwdriver) Here’s how to test your outlet: Turn the key to the ON position: Make sure the engine doesn’t need to run, but power must be on. Test for power in the socket: Insert the test light or meter probe into the center of the socket. The center should have power. If not, power may not be reaching the outlet. Check the ground connection: Touch the socket's side wall with the ground probe. A weak or broken ground can stop the flow of current. If either test shows no signal, the issue could lie with a blown fuse, loose wire, or rusted contact. This can affect models like the Envision just as much as any other vehicle. Fixing the power socket means confirming both the power and ground points are secure and clean. A poor ground is often overlooked, but it can cause all types of problems. When left unchecked, even your car accessory port can stop working with no clear sign. Still unsure? Don’t guess. Visit us at Phillips Buick GMC for a full diagnosis. We’ll help get your outlet—and your ride—back to full strength. Step 3: Inspect the Fuse for a Break or Damage A broken fuse is one of the most common reasons a power outlet stops working. If your car’s outlet, port, or lighter has no power, it’s a smart idea to check the fuse. This is true for many vehicles, whether you drive a Sierra 1500, Enclave, Envision, or Acadia. A fuse helps guard your car’s system from too much power. If it breaks, the flow stops right there. This can stop your car accessory port from working or cause issues if you're trying to fix a car power outlet. Steps to check the fuse: Find your fuse box: Often under the dash or in the engine bay. Your manual can help you find it. Look for the power outlet fuse: Some cars call it the “ACC” or “CIG” fuse. Each model may label it a bit different. Take out the fuse: Use a fuse puller or small pliers. Pull it out slow and safe. Check the metal strip inside: If the strip is broken or dark, the fuse is bad. If the strip is clean and whole, it’s likely still good. Replace with the same type and size: Never use a fuse with more amps than the one you took out. Doing so can harm the system or wires. Fuse Sign What It Means Clean and unbroken Likely still works Burnt or broken Needs to be replaced Loose in socket May not make full contact If a new fuse blows right away, there may be a deeper issue. At that point, it’s best to let a pro take a look. The wiring might need work, or there could be a short. Trying to repair a power socket can seem small, but it all starts with the fuse. If your car cigarette lighter is not working and you've already ruled out the outlet and wires, don’t skip this step. For more help, reach out to Phillips Buick GMC. We’ll track the problem and fix it right the first time. Step 4: Inspect the Wiring for Damage If your power outlet still won’t work after checking the fuse, the wires may be to blame. In many cars, bad wires can cause a full loss of power to the socket. This is a common issue when trying to fix a car power outlet or when your car cigarette lighter is not working. Wires can break, burn, or pull loose over time. In some models—like the Envision, Acadia, Enclave, or Sierra 1500—the wiring can be hard to see. But with some care and light, you can still do a basic check. What to look for: Cuts or splits in the wire cover Burn marks or melted spots Loose or pulled-out plugs Rust or green spots on wire ends Use a flashlight. Move the wires a bit and check each one by hand and by eye. Make sure no wire is crushed under trim or caught behind a panel. Wiring Issue What It Means Melted or burnt wire Too much heat, likely a short Cut or broken wire No power flow, outlet won’t work Loose plug or socket Poor contact, may work off and on Rust or green buildup Moisture damage, needs cleaned How to stay safe while you check: Turn off the car. Pull the key from the switch. Unplug anything from the power port. If you’re unsure, don’t try to patch it with tape. Some fixes need tools or new wire runs. In that case, a pro tech can help repair the power socket fast and safe. A good car accessory port fix starts with strong wires. If yours are worn or burnt, they need work. Still stuck? Come see us at Phillips Buick GMC. We’ll help get your power back on, no stress. Step 5: Seek Professional Help to Repair a Power Outlet Sometimes, fixing a power port is not a simple task. If you’ve tried all the basic steps and it still won’t work, it’s time to call in a pro. What seems like a small issue—such as a car cigarette lighter not working—could point to a deeper fault in the system. Power outlets link to key parts of your car’s wiring. On vehicles like the Acadia, Enclave, Envision, or Sierra 1500, some repairs need more than just tools—they need skill and care. A trained tech will know where to look, what to test, and how to fix it fast. When to seek help: Fuse looks fine, but outlet is still dead You found burnt wires or rust but don’t know how to fix them Plug-in items spark or feel hot You tried a car accessory port fix, but the problem came back Why choose a pro: Reason What You Get Expert skills Quick, safe repair Right tools No guesswork or risky fixes System check Stops future issues before they grow Peace of mind Know the work is done the right way Trying to repair a power socket on your own can lead to more harm than good. What looks like a quick fix may be part of a full circuit issue. That’s why it’s best to let someone trained take a look. If you're not sure what to do next, Phillips Buick GMC is here to help. Our team knows how to fix a car power outlet the right way, and we’ll treat your vehicle with care. Whether it’s a small repair or a full check-up, we’ve got you covered. What are common reasons a car’s power outlet stops working? A car’s power outlet may stop working due to a blown fuse, damaged wiring, internal debris, or a faulty socket. Does a blown fuse or wiring issue cause most power outlet failures? Yes, most power outlet failures are caused by a blown fuse or loose or damaged wiring. Are universal replacement outlets available for modern vehicles? Yes, universal replacement outlets are available and often work well in most modern vehicles, but exact fit and function may vary by model. If you're unsure about the issue or need help choosing the right part, it’s always best to check with a certified technician or parts department. Get Your Car's Electrical System Checked at Phillips Buick GMC If your car's power port still will not work after these steps, our team is ready to help. At Phillips Buick GMC, we know how vital it is to have working gear in your ride. Whether you're in Orlando, Claremont, Winter Garden, or Groveland, we invite you to stop in. Our trained staff can help you fix the issue or guide you to the right part. While you’re here, browse our wide range of new and used vehicles. We have top picks like the GMC Acadia, Buick Enclave, Buick Envision, and GMC Sierra 1500 in stock. Whether you want space, style, or power, there’s something for every need. Need more help keeping your car in top shape? You can always turn to our service team for trusted care. We’re ready to help with more than just power outlet issues. For those wondering how to rotate the tires on a 2025 GMC Canyon, we’ve broken it down step by step. Curious about how far the 2025 Buick Enclave can go on one tank of gas? We've covered that too. We’ve even explained what to do when Buick error codes show up on your dash. Need help with something not listed here? Visit us now! The answer you need may already be waiting for you on our site. Get Directions to Phillips Buick GMC Disclaimer: All information is provided for general informational and entertainment purposes only. While we strive for accuracy, we cannot guarantee that all content is complete, current, or error-free. Any reliance you place on such information is strictly at your own risk. This article may include opinions and is not endorsed by, or officially affiliated with, any vehicle manufacturer or brand. Always consult official sources – such as the vehicle’s owner’s manual, authorized dealerships, or certified professionals – for the most up-to-date and personalized information.
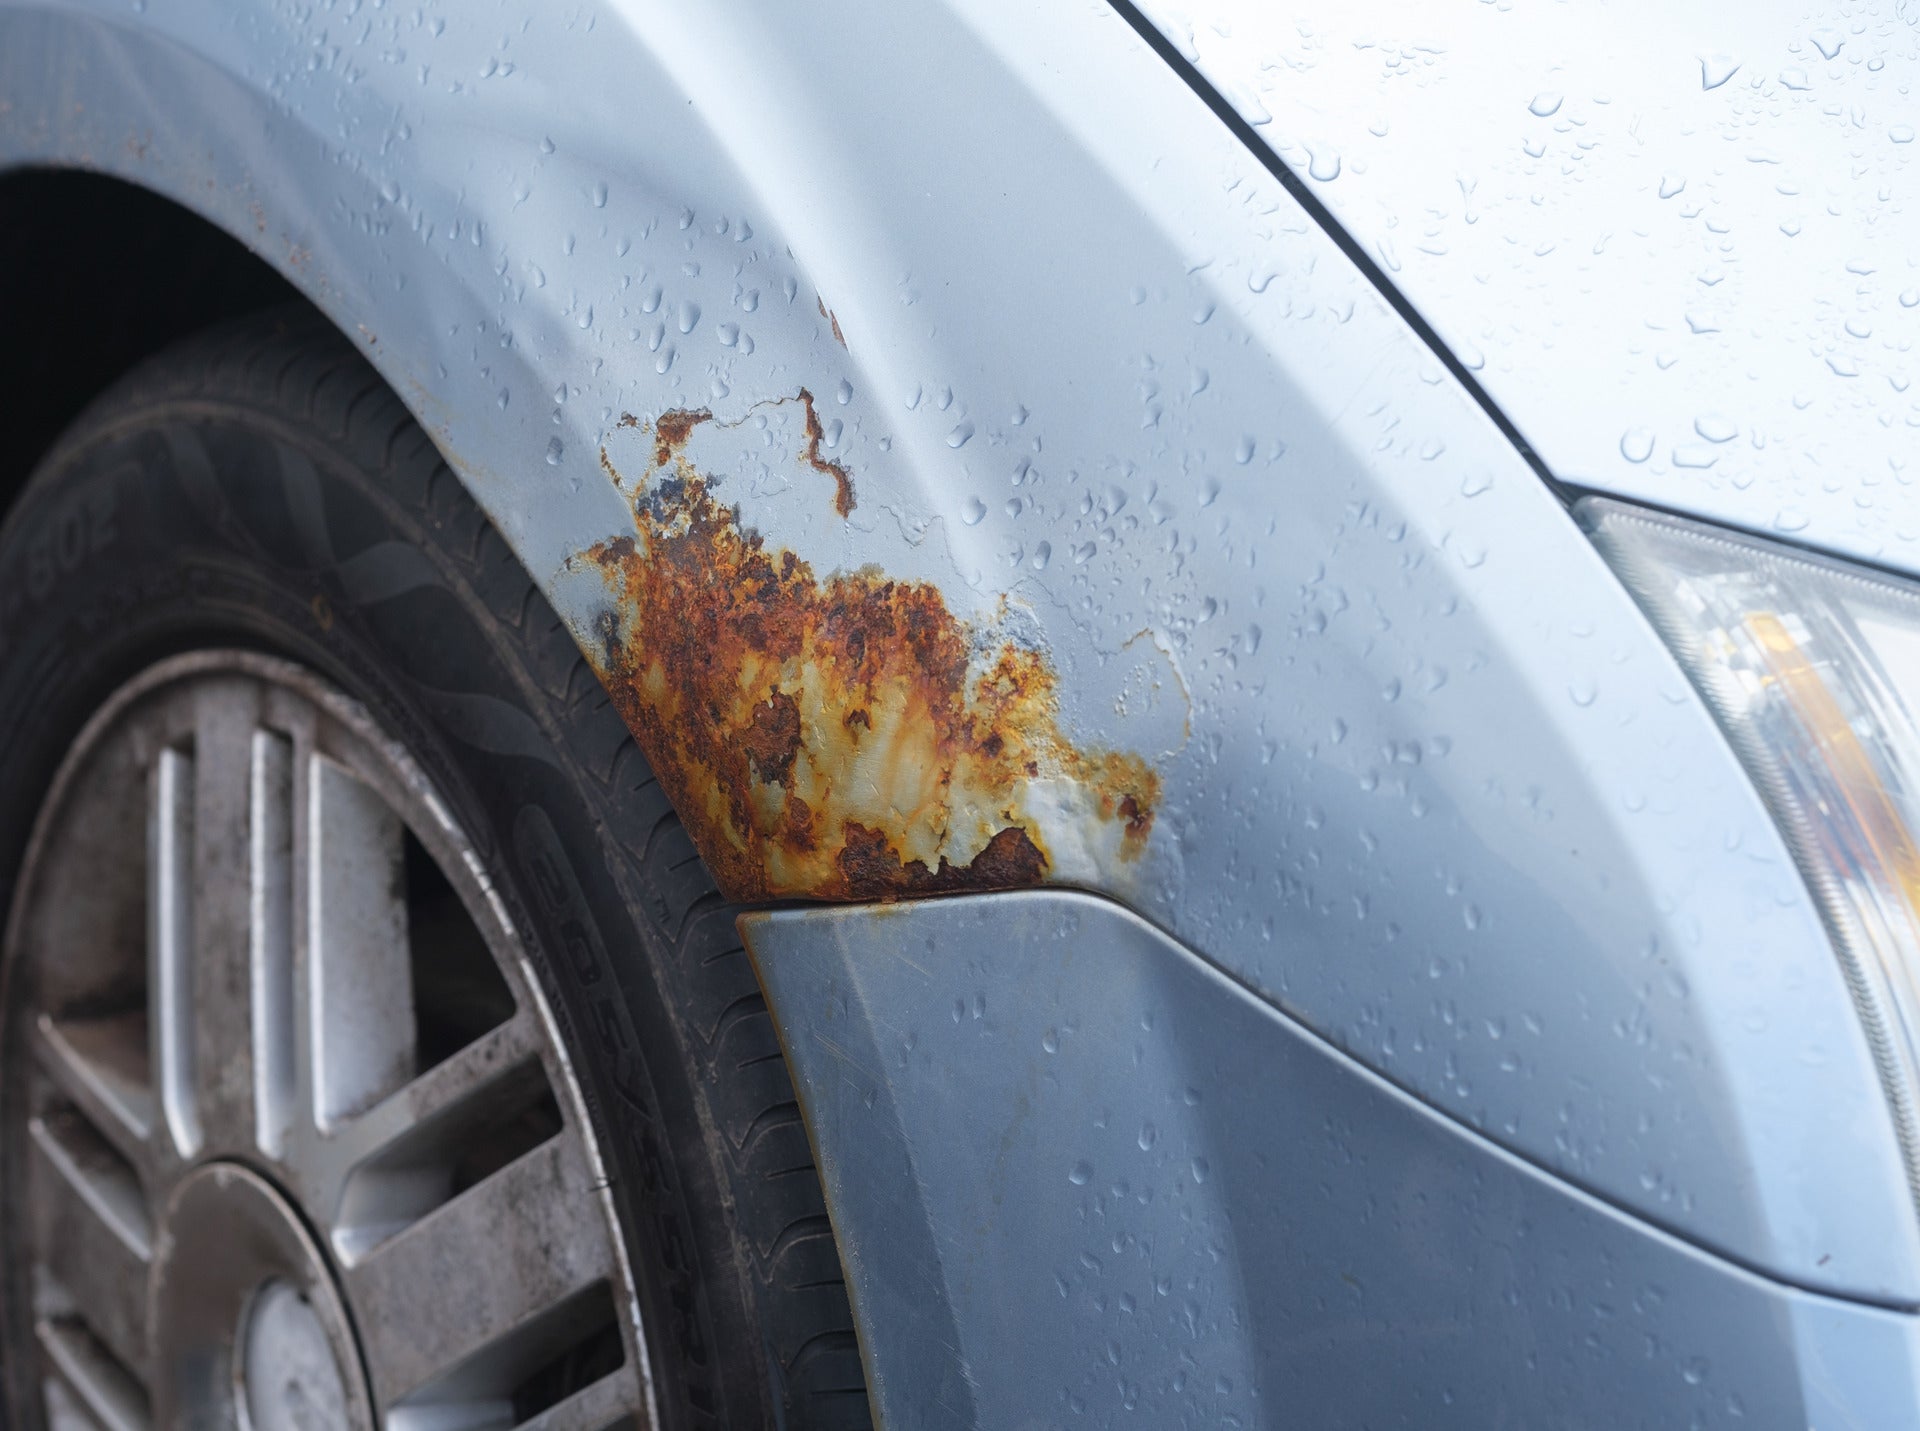
paint oxidizing with some rust damage on a car's wheelwell

How to Fix a Car with Oxidation: A Step-by-Step Guide

If you've noticed your car's once-glossy paint job losing its shine and starting to look dull or chalky, you’re likely dealing with oxidation. This natural process, caused by exposure to sunlight, road salt, and environmental contaminants, can leave your vehicle looking older than it really is. The good news? With the right tools and a little elbow grease, you can restore that paint back to its former glory. In this step-by-step guide, we’ll walk you through how to fix car oxidation and bring your vehicle’s appearance back to life. Whether you drive a rugged Sierra 1500 or a sleek Envision, our tips will help you tackle the problem and get your car looking as good as new. Ready to roll up your sleeves? And if you prefer to leave it to the professionals, feel free to visit or contact Phillips Buick GMC —we're here to help with all your car care needs in Orlando, Claremont, Winter Garden, and Groveland. Service Department Get Directions Contact Us Step 1: Wash Your Car Thoroughly Before diving into fixing car oxidation, the first step in restoring your vehicle’s paint is a clean surface. Washing your car removes dirt, debris, and contaminants that could interfere with the oxidation repair process. Whether you drive an Acadia, Enclave, or Sierra 1500, a good wash is crucial for making the next steps more effective. Here’s how you can wash your car thoroughly to start the restoration process: Gather the Right Supplies Car shampoo or cleaning solution A bucket of water Sponge or wash mitt Microfiber cloth Rinse First Begin by rinsing your vehicle to remove loose dirt and debris. This simple step helps to prevent scratching the paint when you scrub. Wash from Top to Bottom Start washing from the top of the car and work your way down. This method ensures that dirt and grime from the higher parts of the car fall to the lower parts, where they’re less likely to cause damage. Use a Soft Sponge or Wash Mitt Avoid using a rough cloth or harsh material. A soft sponge or wash mitt is ideal for cleaning without causing scratches. Don’t Forget the Wheels Your wheels collect a lot of dirt and grime. Give them a thorough scrub, as contaminants here can also contribute to oxidation. Rinse Again After washing, rinse your car thoroughly. Be sure to remove all soap residue to prevent water spots from forming. Dry with a Microfiber Cloth Dry your car using a microfiber cloth to prevent water spots. Gently blot or wipe the surface, avoiding any harsh rubbing that could scratch the paint. A clean car is the best way to begin the process of removing oxidation step by step. By ensuring your vehicle is free of dirt and contaminants, you’re setting the stage for successful restoration. Once your vehicle is clean, you’ll be ready to move on to the next phase of oxidation repair. Step 2: Use a Clay Bar to Remove Contaminants After washing your car thoroughly, the next step in fixing oxidation is to remove any remaining contaminants from the paint. This is where a clay bar comes in. Using a clay bar is essential to ensure a smooth surface before applying any polishing or rubbing compounds. Here's how to use a clay bar effectively: Gather Your Materials Clay bar Clay bar lubricant (or soapy water) Microfiber towels Prepare the Surface Before you begin, ensure the car’s surface is wet. You can either use a specific clay bar lubricant or mix some soapy water. This will help the clay bar glide smoothly over the paint. Break Off a Small Piece of Clay Take a small portion of the clay bar and knead it into a flat shape. This will make it easier to work with and reach all areas of the car. Start Claying the Vehicle Gently rub the clay bar back and forth across the car's surface. Work in small sections, using light pressure. Focus on areas where the paint feels rough or uneven, as these areas may have contaminants or oxidation buildup. Keep the Surface Wet As you move the clay bar over the paint, reapply lubricant as needed. This keeps the surface smooth and prevents any scratching. Check the Clay Bar After a few passes, check the clay bar. If it becomes dirty or picks up contaminants, fold it over to reveal a clean section. This helps ensure you’re not rubbing dirt back into the paint. Wipe Down with a Microfiber Cloth After each section, use a microfiber cloth to wipe away any residue and check the smoothness of the surface. Using a clay bar helps to restore car paint oxidation by removing embedded contaminants that could prevent the next stages of oxidation repair. Once the surface is free of dirt and grime, you’ll be ready to proceed with polishing and restoring the shine to your vehicle. Whether you drive an Enclave, Envision, or Sierra 1500, taking the time to clay your vehicle ensures that you’re removing oxidation step by step in the most effective way. Step 3: Apply a Polishing Compound Now that you've removed contaminants from your car's paint, the next step is to apply a polishing compound. This is one of the most effective ways to restore car paint oxidation and get your vehicle looking shiny and new again. The polishing compound works by buffing out the oxidized layers of paint, revealing a smooth, glossy finish. Here’s how to apply a polishing compound: Choose the Right Polishing Compound There are many types of polishing compounds. Select one that matches the level of oxidation you’re dealing with. Light oxidation may need a mild compound, while heavier oxidation may require a more aggressive one. Gather Your Tools Polishing compound Applicator pad or polishing machine Microfiber towels Apply the Compound Start by applying a small amount of polishing compound to the applicator pad. If using a machine, apply a few drops of compound directly to the pad. You don’t need much—just enough to cover the section you’re working on. Work in Small Sections Begin with a small, manageable area. Work the compound into the paint using a circular or back-and-forth motion. If you’re using a machine, set it to a low speed to avoid damage. If you’re applying by hand, use even pressure to work the compound in. Buff the Area After a few minutes of working the compound into the paint, use a microfiber towel to wipe off the excess. You should start to see a noticeable difference in the paint’s appearance. Inspect Your Work Once you’ve polished an area, step back and inspect it. You should notice a smoother, shinier surface. If any oxidation is still visible, apply a second layer of compound and repeat the process. Move to the Next Section Continue working in small sections around your vehicle, making sure each area is polished to your satisfaction. Applying a polishing compound is a crucial step in fixing car oxidation. It helps remove the cloudy, dull appearance caused by oxidation and leaves behind a shiny, restored surface. Whether you drive an Acadia, Enclave, or Sierra 1500, this step will help bring out the best in your vehicle’s paint. By following this process, you are removing oxidation step by step and restoring your car’s beautiful finish. Step 4: Consider Using a Rubbing Compound for Heavy Oxidation If your car still shows signs of heavy oxidation after using a polishing compound, it's time to consider a rubbing compound. A rubbing compound is stronger and more abrasive than a polishing compound, making it ideal for removing stubborn oxidation. This step is especially helpful when restoring car paint oxidation that just won't come out with regular polishing. Here’s how to use a rubbing compound: Choose the Right Rubbing Compound Rubbing compounds come in different levels of abrasiveness. For heavy oxidation, you'll need a more aggressive formula. However, be careful not to overdo it, as too much abrasion can damage your paint. Gather Your Tools Rubbing compound Applicator pad or polishing machine Microfiber towels Apply the Rubbing Compound Just like with the polishing compound, apply a small amount of rubbing compound to your applicator pad or directly to the polishing machine. A little goes a long way, so start with a small drop. Work in Small Sections Focus on one area at a time. Rub the compound into the oxidized paint using a circular motion. If you’re using a machine, keep the speed low to prevent paint damage. Buff the Surface Once the rubbing compound has been worked into the paint, use a clean microfiber towel to wipe off the excess. You’ll begin to see the oxidation slowly vanish as the surface smooths out. Inspect the Results After buffing, examine the area closely. If the oxidation is still visible, you may need to apply more compound and repeat the process. However, most cases of heavy oxidation will be noticeably reduced after a single application. Move to the Next Section Continue working in sections, applying the rubbing compound where necessary. Be sure to buff each section thoroughly before moving on. Using a rubbing compound for oxidation repair is a powerful way to remove stubborn oxidation step by step. Whether you're working on an Acadia, Enclave, or Sierra 1500, this method will help restore car paint oxidation and bring back the vehicle’s original shine. Step 5: Wax Your Vehicle to Seal the Paint After removing oxidation and restoring your car's paint, it's time to seal the surface with a high-quality wax. Waxing your vehicle will protect the paint and maintain its restored shine. This step is essential to ensure that your hard work doesn't go to waste. Here’s how to properly wax your vehicle: Choose the Right Wax Select a wax that suits your car’s paint. There are several types of waxes available, including liquid, paste, and spray options. Liquid waxes are easier to apply, while paste waxes offer long-lasting protection. Prepare the Surface Make sure the paint is completely dry before applying wax. If the car surface is still damp, the wax won’t adhere as effectively. Apply the Wax Use a soft microfiber cloth or an applicator pad to apply a thin, even layer of wax. Work in small sections, starting from the top of the vehicle and moving down. This helps ensure that no wax is left on areas that are harder to reach. Let the Wax Dry Allow the wax to dry to a haze. This typically takes about 5-10 minutes, depending on the temperature. Don’t rush this process, as drying time is important for the wax to bond to the paint. Buff the Surface Once the wax has dried, use a clean microfiber towel to buff off the residue. Work in circular motions to remove all excess wax and bring out the shine. Check for Residue Inspect your car carefully for any leftover wax. It’s important to remove all residue to avoid spots and streaks. Repeat as Needed If necessary, apply a second layer of wax for extra protection. This is particularly helpful for vehicles that experience harsh weather conditions. Waxing your vehicle helps seal in all your hard work and provides an extra layer of protection against dirt, water, and environmental elements. It also prevents further oxidation from setting in, ensuring that the paint stays looking fresh for a longer period. For those who drive vehicles like the Acadia, Enclave, or Sierra 1500, regular waxing is an easy way to keep the car's exterior looking sharp. Waxing is the final step to protect your car's restored paint and maintain that glossy, new-car look. Get Your Car's Rust & Oxidation Fixed Professionally While DIY methods can help reduce minor paint oxidation, sometimes restoring your vehicle’s shine requires professional care. That’s where the Phillips Buick GMC Collision Center and Body Shop comes in. Conveniently located near Orlando, Clermont, Winter Garden, and Groveland, our certified technicians are equipped to handle everything from surface-level oxidation to more advanced rust and paint damage. Rust and oxidation don’t just impact your car’s appearance—they can also lead to long-term corrosion that affects your vehicle’s value and performance. Our body shop team uses industry-leading tools and products to safely remove oxidation, repair paint damage, and restore your car’s exterior to its original condition. Why Trust Phillips Buick GMC? ✅ Certified collision repair experts ✅ State-of-the-art body shop for paint correction and refinishing ✅ Comprehensive rust repair and prevention services ✅ OEM-approved materials and technology for lasting results Whether you’re driving a stylish Buick Envision, a rugged GMC Sierra 1500, or a dependable Acadia, you deserve a vehicle that looks as great as it drives. Let our collision and body shop specialists handle the heavy lifting. We’ll not only fix visible oxidation but also apply protective coatings to help prevent future damage. Book Your Appointment Today Don’t let chalky, faded paint bring down your vehicle’s value or curb appeal. Schedule a visit to the Phillips Collision Center or contact our team today to get a custom quote. We’ll inspect your vehicle and recommend the right treatment plan to get your paint looking vibrant again. Prefer a hands-off approach? Let us handle the oxidation for you while you relax—Phillips Buick GMC is your trusted partner for professional car care in Central Florida. Which products are recommended for removing oxidation from car paint? To remove oxidation from car paint, it's recommended to use a clay bar to remove surface contaminants, followed by a polishing compound to restore the shine. If oxidation is severe, a rubbing compound may be necessary for heavy-duty removal. Is wet sanding ever necessary for severe oxidation? Yes, wet sanding may be necessary for severe oxidation. It’s a more aggressive method that involves using fine sandpaper and water to smooth the paint surface before polishing. However, it’s important to proceed carefully and consider professional help if unsure. How can I maintain the paint finish once oxidation is removed? To maintain the paint finish after oxidation removal, regularly wash your car with a gentle, pH-balanced car soap, and wax your car every few months. Waxing provides a protective layer that helps shield the paint from environmental damage. Additionally, storing the vehicle in a garage or shaded area can help prevent future oxidation. Restore Your Vehicle’s Paint & Explore Our Quality Vehicles If you’re looking to restore your vehicle’s paint and protect it from future oxidation, Phillips Buick GMC is here to help. Whether you're in Orlando, Claremont, Winter Garden, or Groveland, we invite you to explore our wide selection of vehicles, including the Acadia, Enclave, Envision, and Sierra 1500. Our team is dedicated to providing you with top-notch service and high-quality vehicles. For more information on maintaining your car, you can explore how to keep your vehicle in optimal shape. Learn more about routine maintenance tasks like tire rotations for the 2025 Buick Envision, Buick Encore GX, and GMC Sierra 1500. We have helpful tips on keeping your vehicle running smoothly over time. Visit our Body Shop Services to find out how we can assist with your vehicle care needs. Feel free to contact us for any questions or assistance, or stop by Phillips Buick GMC to find your next car and ensure it stays in great condition for years to come. Get Directions to Phillips Buick GMC Disclaimer: All information is provided for general informational and entertainment purposes only. While we strive for accuracy, we cannot guarantee that all content is complete, current, or error-free. Any reliance you place on such information is strictly at your own risk. This article may include opinions and is not endorsed by, or officially affiliated with, any vehicle manufacturer or brand. Always consult official sources – such as the vehicle’s owner’s manual, authorized dealerships, or certified professionals – for the most up-to-date and personalized information.
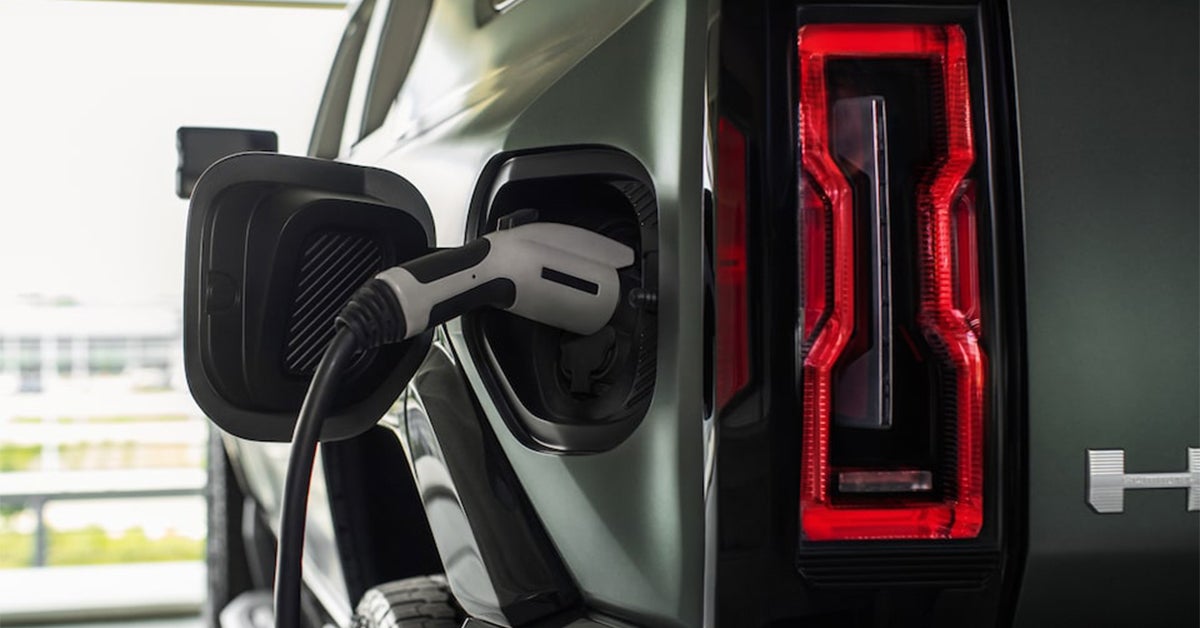
2025 GMC Hummer EV SUV charging up

Why Does EV Charging Take so Long?

When it comes to electric vehicles (EVs), one question many drivers have is, "Why does charging take so long?" Whether you’re behind the wheel of a Hummer EV SUV, the Hummer EV Pickup, or the Sierra EV, understanding the factors that affect charging times can help you plan your day and manage your vehicle’s range more efficiently. Unlike refueling a traditional gas-powered car, EV charging times can vary greatly depending on several factors. In this article, we’ll break down the key reasons why EV charging can take longer than expected and how you can optimize the process for your electric vehicle. At Phillips Buick GMC, we’re here to help you navigate the world of electric vehicles, so feel free to reach out to us for more information or visit our dealership to explore the latest models. Service Department Get Directions Contact Us Factors that Influence Your EV's Charging Time Charging your electric vehicle (EV) might take longer than you expect, but there are several factors that influence the time it takes to get your battery to 100%. Understanding these key factors can help you manage your driving schedule and keep your EV running smoothly. Here are the main reasons behind why EV charging can be slow and how each one impacts electric vehicle charge duration: 1. Charging Equipment Not all charging equipment is the same. The type of charger you use has a significant impact on how long it will take to charge your vehicle. 2. Battery Size Larger batteries take longer to charge. The Hummer EV SUV, for example, comes with a 205 kWh battery, while a vehicle with a smaller battery, like the Sierra EV, will require less time to reach a full charge. The bigger the battery, the more energy it takes to fill up, which means longer charge times, even when using fast chargers. This is a big reason for why EV charging can feel slow, especially if you’re trying to charge a high-capacity battery quickly. 3. Charger Capacity Another factor is the onboard charger in the vehicle. The onboard charger converts the electricity from the power source into energy that charges the battery. If your EV has a smaller onboard charger, it will take longer to charge the battery. For example, if a vehicle like the Hummer EV Pickup has a charger rated at a lower capacity, it will be slower compared to other vehicles with more powerful charging systems. 4. Battery Condition and Temperature The temperature of the battery can also affect charging times. When temperatures are very cold or extremely hot, the battery’s charging efficiency decreases. This can cause longer charging times, even on fast chargers. Keeping your EV in a moderate climate can help reduce slow EV charger reasons related to temperature issues. 5. State of Charge (SoC) Where your battery stands when you begin charging plays a role. Charging a battery from 10% to 80% is much faster than charging from 80% to 100%. This is why many drivers use DC fast chargers to add 80% of the charge in a quick time, then rely on Level 2 chargers for the final 20%. 6. Charging Source Availability Where you charge your EV matters too. If you're using a public charging station with multiple users, the available power might be split, slowing down the charging time. This is why charging at home with a dedicated Level 2 charger is often the most reliable option. How Does the Type of Charger Affect EV Charging Times? The type of charger you use is one of the most significant factors that determine how long it will take to charge your electric vehicle (EV). Charging speeds can vary greatly, and understanding how different chargers work can help explain why some EV charging times are longer than others. Here’s a breakdown of the key charger types and how they impact the time it takes to charge your vehicle. 1. Level 1 Charger (120 volts) Speed: This is the slowest charger, usually a standard household outlet. It adds about 2 to 5 miles of range per hour. Best for: Overnight charging when you don’t need a fast charge. EVs Affected: While it's fine for smaller EVs or lower-mileage trips, a large battery, like the one in the Hummer EV Pickup, could take several days to fully charge on a Level 1 charger. This is a major reason why EV charging can feel slow. 2. Level 2 Charger (240 volts) Speed: This type is much faster, providing around 10 to 60 miles of range per hour, depending on the vehicle. Best for: Home installation, public charging stations, and daily use. EVs Affected: With larger batteries, like the one in the Hummer EV SUV, a Level 2 charger can take several hours to fully charge the vehicle. But it’s still a much quicker option than Level 1. 3. DC Fast Charger (400 volts or more) Speed: The fastest option available. DC fast chargers can add 100 miles of range in as little as 20 minutes. Best for: Quick charging during long trips or when you’re in a hurry. EVs Affected: Even the largest EVs, like the Sierra EV or Hummer EV Pickup, benefit from the speed of DC fast chargers, but keep in mind that the last 20% of the battery may still take longer to fill, slowing down the overall charge time. 4. Superchargers (Tesla-Specific) Speed: Tesla Superchargers are a variant of DC fast charging, providing rapid charge times for Tesla vehicles. Best for: Tesla owners looking for quick top-ups during longer trips. EVs Affected: These chargers are specific to Tesla vehicles, so they don’t work with all EV models. This is important to consider if you’re driving a Hummer EV or Sierra EV. Charging Speed Summary Charger Type Typical Speed Best For Level 1 (120V) 2 to 5 miles per hour Overnight, low-mileage driving Level 2 (240V) 10 to 60 miles per hour Home installation, daily use DC Fast Charger 100+ miles in 20 minutes Quick top-ups during long trips Tesla Supercharger 150+ miles in 30 minutes Tesla-specific, fast long-distance charging In conclusion, the type of charger you use greatly impacts your EV’s charging speed. Whether you’re driving a Hummer EV Pickup or a Sierra EV, knowing which charger to use for your situation can save time and reduce frustration. Why Is Your EV Charging So Slow? Identifying the Reasons If you’ve noticed your electric vehicle (EV) taking longer to charge than expected, you’re not alone. There are several reasons why charging times might be slower than you’d like. Let’s explore some common issues that can cause slower charging speeds and what you can do to fix them. 1. Using the Wrong Charger The type of charger you use plays a significant role in charging speed. A Level 1 charger (120 volts) will charge your vehicle much slower than a Level 2 charger (240 volts) or a DC fast charger. Level 1 chargers: Often the cause of slow EV charging because they provide minimal power. If you're charging a large battery, like that in the Hummer EV Pickup or Sierra EV, the process can take over a day. Level 2 chargers: Offer a faster solution, but even they might not be quick enough for EVs with larger batteries. If you're charging a Hummer EV SUV, you might still need several hours. 2. Battery Size and State of Charge The size of your vehicle's battery affects how long it takes to charge. Larger batteries, like those in the Hummer EV SUV, take longer to charge than smaller ones. Also, if your battery is nearly empty, it may take longer to charge initially. Battery size: The bigger the battery, the longer it will take to charge. State of charge: Charging is usually faster when the battery isn’t fully drained. 3. Charging Station or Outlet Issues Sometimes, the issue lies with the charging station or outlet. If the station isn’t providing enough power, or if there’s an issue with the electrical wiring, charging could take much longer. Overloaded circuits: Multiple cars charging at the same time can slow down your EV’s charge. Wiring issues: Faulty or old wiring can reduce the power supply, affecting your charging speed. 4. Vehicle Software and Settings Some EVs may have settings that limit charging speeds. These settings can be adjusted, but it's easy to overlook them. Check your vehicle’s settings to make sure nothing is limiting your charging speed. 5. Temperature Impact Extreme temperatures—either hot or cold—can slow down the charging process. EV batteries don’t perform as well in extreme weather conditions. If it's very hot or cold outside, your vehicle may take longer to charge. 6. Charger Compatibility and Condition Not all chargers are created equal. Older chargers or ones that aren’t properly maintained might charge more slowly. Make sure your charger is up-to-date and compatible with your vehicle. Common Slow Charging Reasons: Cause Description Wrong charger type Level 1 chargers provide slower charging speeds. Large battery size Larger EV batteries take longer to charge. Charging station issues Poor wiring or overloaded circuits slow charging. Vehicle settings Some settings limit charging speeds. Extreme temperatures Hot or cold weather can affect battery performance. Charger condition Outdated or damaged chargers slow down the process. By addressing these common slow charging issues, you can help speed up the process and get back on the road faster. Whether you're driving a Sierra EV or a Hummer EV Pickup, understanding the factors that influence EV charging times can make a big difference in your experience. What Is the Role of Battery Size in EV Charging Times? Battery size plays a crucial role in how long it takes to charge your electric vehicle (EV). Larger batteries take longer to charge than smaller ones, and this can be one of the main reasons why you might experience slower charging times. Let’s explore how battery size impacts EV charging and what it means for you as a driver. 1. Larger Batteries Mean Longer Charging Times EVs with larger batteries, like the Hummer EV SUV or Hummer EV Pickup, require more time to charge. A larger battery stores more energy, and charging it takes longer than charging a smaller battery. This is especially noticeable when you're using a Level 1 charger, which is typically slower. More energy to store: Bigger batteries need more time to charge fully. Longer duration for large EVs: Charging times can extend several hours or even a full day for larger EVs. 2. Battery Charge State and Size The state of charge in your EV’s battery also affects how long it takes to charge. When a battery is nearly empty, it usually takes longer to charge initially. However, as the battery fills up, the charging time decreases. Empty battery: It takes more time to charge when the battery is near empty. Full battery: Charging time decreases once the battery is partially charged. 3. Impact on Charging Speed Across Different Chargers A larger battery may still charge faster on a higher-powered charger. For example, a Level 2 charger will typically charge a larger battery much faster than a Level 1 charger. However, even with a Level 2 charger, a large battery will still take longer than a smaller one. 4. Battery Chemistry and Size Different battery chemistries can impact charging times. While size is important, the materials used in the battery, such as lithium-ion, also play a role in how quickly energy can be stored. Lithium-ion batteries: Most EVs, including the Sierra EV, use lithium-ion batteries, which are generally efficient but still take time to charge depending on size. Battery management: Some EVs include battery management systems to optimize charging speeds based on the battery size and state of charge. Key Points About Battery Size and Charging Times: Factor Impact on Charging Larger battery size Takes longer to charge due to more energy storage. Battery charge state Empty batteries take longer to charge initially. Charger type Level 1 chargers slow down charging for larger batteries. Battery chemistry Impacts charging efficiency and time. Understanding the role of battery size in EV charging times helps set realistic expectations when you're planning your charging sessions. Whether you're driving a large vehicle like the Hummer EV Pickup or a more compact model, knowing how battery size affects your charging duration can help you manage your time better. Why Does EV Charging Slow Down After a Certain Point? Have you ever noticed that your electric vehicle’s (EV) charging speed seems to slow down as it gets closer to a full charge? This is a common phenomenon, and it’s due to several factors. Understanding why this happens can help you manage your charging sessions more effectively and avoid any surprises. 1. Battery Management System (BMS) Regulation As your EV’s battery fills up, the Battery Management System (BMS) works to prevent overcharging. It does this by slowing down the charging speed as the battery approaches full capacity. This ensures the battery is charged safely and helps protect its lifespan. Preventing overcharging: The system reduces the charge rate to prevent damage. Maximizing battery life: Slow charging as the battery fills helps keep it healthy. 2. The Charging Curve When charging an EV, the charging speed isn’t constant. Early on, the charging process is faster, as the battery can accept more energy at a higher rate. As the battery fills up, the speed slows down. This is often called a "charging curve." Faster at the start: Batteries charge quickly when they are empty. Slower as you go: The last 20-30% of the charge is slower to protect the battery. 3. Temperature Control Charging generates heat, and as the battery fills up, it may get hotter. To protect the battery from overheating, the charging speed may be reduced. This is especially true in larger EVs, like the Hummer EV Pickup or Sierra EV, which have bigger batteries and are more prone to heat buildup. Overheating protection: Slower charging helps avoid excessive heat that could damage the battery. Battery cooling: Some EVs have built-in cooling systems to manage temperature during charging. 4. Charger Limitations Not all chargers are capable of delivering power at a consistent rate throughout the entire charging process. Some chargers, especially slower ones like Level 1 chargers, may start charging fast but then slow down as the battery nears full capacity. Even with faster chargers like Level 2, the charging speed will decrease as the battery fills up. Charger type: Level 1 chargers are slower and see a noticeable drop in speed as the battery fills. Fast chargers: Even high-speed chargers like Level 3 slow down in the final stages. Key Points About Slowdown During EV Charging: Factor Reason for Slowdown Battery Management System Slows charging to prevent overcharging and protect the battery. Charging Curve Faster at first, slower as the battery fills to ensure efficiency. Temperature Heat buildup triggers slower charging to prevent overheating. Charger Type Slower chargers reduce speed as the battery nears full capacity. Understanding why charging slows down after a certain point helps you be more patient and aware of your EV’s needs. Whether you're charging a Hummer EV SUV or a more compact EV, this natural slowdown is a normal part of the process designed to protect the battery. What Can You Do to Reduce EV Charging Time? There are a few ways to reduce the time it takes to charge your EV. If you're tired of slow charging speeds, consider these practical tips. With the right approach, you can make your charging sessions more efficient, whether you drive a Hummer EV Pickup, Sierra EV, or another model. 1. Use a Faster Charger The most obvious way to speed up your charging time is by using a faster charger. The type of charger you use will significantly impact how quickly your vehicle charges. Level 1 Chargers: These are the slowest, often found in standard home outlets. Level 2 Chargers: These offer faster charging speeds and are great for home installations. Level 3 Chargers: These are the fastest, typically found at public charging stations. They provide a rapid charge, especially for larger batteries. 2. Charge During Optimal Conditions Charging time can also be affected by the temperature. Charging your EV in extreme heat or cold can slow down the process. Avoid extreme temperatures: Charging in cooler conditions is ideal. Pre-condition your battery: Some EVs, including the Hummer EV SUV, can be pre-conditioned before charging to improve efficiency. 3. Monitor Your Battery Level Charging your EV at the right time can help reduce charge duration. Don’t wait until the battery is completely empty or nearly full to start charging. Don’t let it get too low: Charging from very low battery levels takes longer. Avoid overcharging: Charging to 100% isn’t necessary unless you’re going on a long trip. 4. Avoid Charging While Using Power-Hungry Features If you're using features like climate control while charging, your EV may use power that would otherwise go to the battery. This can increase the time it takes to charge. Turn off climate control: Let the car charge without extra power usage. Limit other high-energy features: Minimize using the infotainment system or other features while charging. 5. Upgrade Your Charging Equipment Sometimes, the bottleneck for faster charging is your own equipment. Upgrading to higher-quality charging equipment can make a big difference. Choose an upgraded home charger: This may allow for faster charging speeds than older models. Check your home’s wiring: Ensure your electrical system supports faster charging. Key Tips to Speed Up Your EV Charging: Tip Why It Helps Use a faster charger Faster chargers reduce overall charging time. Charge during optimal conditions Mild temperatures improve charging speed and efficiency. Charge before battery is too low Avoiding extremely low battery levels speeds up charging. Turn off power-hungry features Helps direct more power to the battery during charging. Upgrade charging equipment Better equipment leads to faster charging speeds. By following these tips, you can cut down on your electric vehicle charge duration. Whether you drive a Sierra EV or any other model, these strategies can help you make the most out of your charging sessions. What factors influence the charging speed of electric vehicles? Charging speed is influenced by several factors, including the charger type, battery capacity, temperature, and the vehicle’s internal charging system. The speed at which you charge can also depend on how much charge the battery already has and whether you’re using features like climate control during the process. How do battery capacity and charger type affect charge times? Battery capacity and charger type both play significant roles in determining charge times. Larger battery capacities require more time to charge, especially when using slower chargers. The charger type also matters—Level 1 chargers are the slowest, while Level 3 chargers provide the fastest charging speeds. Can extreme temperatures slow down or speed up EV charging? Yes, extreme temperatures can impact the charging process. Cold temperatures tend to slow down charging, as the battery's internal chemistry becomes less efficient. On the other hand, very hot temperatures can cause the charging system to slow down to protect the battery. Charging is most efficient in moderate temperatures. Keep Your EV Charged and On the Road with Phillips Buick GMC As you explore more about EVs and their charging times, don’t forget to visit Phillips Buick GMC for any questions you may have. Our team is here to help you with all things related to electric vehicles. Whether you're interested in learning about the latest EV charging technologies or have questions about your specific vehicle, we’re ready to assist. If you're located in Orlando, Claremont, Winter Garden, or Groveland, take the time to check out our wide selection of electric vehicles, including the Hummer EV SUV, Hummer EV Pickup, and Sierra EV. You can explore these models and more by visiting our EV Inventory. Additionally, for those looking to take care of their new EV, you can find helpful tips on maintaining your vehicle. For example, learn how to rotate the tires on your 2025 GMC Sierra EV, how to rotate the tires on your 2025 GMC Hummer EV SUV, or even how to rotate the tires on your 2025 Buick Envista. Understanding these simple maintenance tasks ensures your EV stays in top shape for years to come. Explore our site today and reach out with any questions! Get Directions to Phillips Buick GMC Disclaimer: All information is provided for general informational and entertainment purposes only. While we strive for accuracy, we cannot guarantee that all content is complete, current, or error-free. Any reliance you place on such information is strictly at your own risk. This article may include opinions and is not endorsed by, or officially affiliated with, any vehicle manufacturer or brand. Always consult official sources – such as the vehicle’s owner’s manual, authorized dealerships, or certified professionals – for the most up-to-date and personalized information.

Car with paint peeling on the hood

5 Ways to Fix Paint Peeling on a Car

Peeling paint on your car isn’t just an eyesore—it’s a warning sign. Whether you’re commuting through Winter Garden, cruising the roads of Claremont, or heading out from Orlando in your GMC Sierra 1500 or Buick Envision, no one wants their vehicle looking worn down by flaky, damaged paint. The good news? You don’t have to live with it. This blog will walk you through five smart, effective ways to fix paint peeling on a car. From quick DIY solutions to more advanced automotive paint restoration techniques, we’ve got you covered. These tips work whether you drive a bold Sierra 1500, a refined Buick Enclave, a stylish Acadia, or a dependable Envision. And if you’re in Groveland or anywhere nearby and want expert help, the team at Phillips Buick GMC is ready to assist. If you're noticing chipping paint or widespread peeling, Phillips Buick GMC’s Collision Center and Body Shop in Fruitland Park is your local source for expert automotive paint repair. Our service professionals are trained to handle everything from minor paint fixes to full-on peeling paint repair jobs. Read on to discover your best options—and stop that peeling paint before it gets worse. Schedule Service Get Directions Contact Us 1. Use a DIY Paint Repair Kit for Minor Peeling If the peeling on your car is small, a DIY paint kit may be all you need. These kits are low-cost and easy to use. Many drivers who own an Acadia, Enclave, Envision, or Sierra 1500 turn to these kits for light touch-ups. They’re made for jobs you can do at home, even with little skill or gear. It’s a fast fix that can keep the damage from getting worse. Here’s why a kit may be a smart move if you want to fix paint peeling car spots on your own. What’s in a Typical DIY Paint Kit Most kits come with all the tools you’ll need. You won’t have to buy each item one by one. Kits often include: Sandpaper for smoothing rough spots Primer to prep the surface Paint made to match your car’s shade A clear coat for shine and seal A brush or pen for small fixes Gloves and tape to stay clean and neat Steps to Use a Paint Repair Kit The steps are short and easy to follow. If you work slow and with care, your car can look good again. Clean the surface: Make sure the area is dry, smooth, and free of dust. Sand the edges: Use the sandpaper to blend the peeled edge with the rest of the paint. Add primer: A thin coat is best. Let it dry before you move on. Apply color paint: Match the shade. Use light coats and let each one dry well. Seal with clear coat: This keeps the new paint safe from the sun and rain. Let it dry: Keep the area dry for 24 hours so the paint can cure. This type of peeling paint repair works well when the spot is small. You don’t need a full automotive paint restoration. You just need a steady hand and a bit of time. If you’re not sure where to start, use a car paint fix guide or reach out for help. Phillips Buick GMC is here to support Orlando-area drivers with the tools and tips they need to keep their cars in shape. 2. Apply a Clear Coat to Seal and Protect Once you’ve touched up your car’s paint, the job is not done yet. You need to seal the surface. A clear coat keeps your work safe from sun, rain, and dirt. It also adds shine and helps the color blend in. Even newer models like the Acadia, Enclave, Envision, and Sierra 1500 need paint care. A clear coat is one of the best ways to stop small chips from turning into big spots. It’s also a smart step in any car paint fix guide. If you’re looking to fix paint peeling car areas for good, this step matters. Why Clear Coat Matters Clear coat is more than just gloss. It adds a hard layer to the paint. This helps keep it strong. Fights off UV rays from the sun Stops water from soaking through Blocks dirt and salt from sticking Helps smooth out minor flaws in paint Makes your car look new again How to Apply Clear Coat You don’t need to be a pro. Just follow a few steps and take your time. Prep the area: Make sure the paint is dry. Wipe off dust with a clean cloth. Shake the can: Most clear coats come in a spray. Shake it well to mix the formula. Spray smooth, light coats: Hold the can 6 to 8 inches from the surface. Use thin layers. Wait between coats: Give each coat time to dry. Two or three coats should be enough. Let it cure: Leave the car in a dry, cool place for at least 24 hours. If done right, clear coat helps make your peeling paint repair last much longer. You may not need a full automotive paint restoration if you stay ahead of small flaws like this. For more help, stop by Phillips Buick GMC. We’ll be glad to share tips and help Orlando-area drivers protect their vehicles with care. 3. Wet Sanding and Polishing the Damaged Area If you see your car’s paint start to flake or chip, wet sanding may help smooth things out. This step can bring the surface back to life. It removes the rough edges where paint has started to peel. Once smooth, polish brings back the shine. Wet sanding is not hard. But it does take care and time. It’s one of the best ways to start a peeling paint repair job. This step can help you avoid full automotive paint restoration. Even newer vehicles like the Acadia, Enclave, Envision, or Sierra 1500 can benefit from this touch-up. Why Use Wet Sanding? Smooths out chipped or flaked paint Helps new paint stick better Gets rid of sharp edges around damage Preps the area for clear coat or polish Steps to Wet Sand and Polish You don’t need special tools. Just go slow and stay patient. Soak your sandpaper: Use fine grit. Soak it in water for at least 15 minutes. This keeps it from scratching. Work small areas: Wet the car’s surface. Rub in short, light strokes. Do not press too hard. Keep it wet: Dip your sandpaper in water as you go. This helps keep the surface smooth. Wipe clean: Use a soft cloth to clean the area when you finish sanding. Polish the surface: Use a mild polish to bring back the shine. Buff with a clean, dry cloth. This method helps drivers fix paint peeling car spots before they grow. For Orlando-area drivers, it’s a smart part of any car paint fix guide. Wet sanding is safe when done right. It gives you a clean, even base to work from. Need help or tools? Phillips Buick GMC can guide you through the steps or take care of it for you. 4. Repair Paint Chips and Scratches Promptly Small chips and scratches may not seem like a big deal at first. But left alone, they can grow fast. Water, sun, and air all work together to make a small flaw worse. Soon, a tiny chip can lead to flaking or even rust. For drivers who want to fix paint peeling car issues before they start, quick action is key. Acting fast can help avoid costly peeling paint repair or full automotive paint restoration down the road. Even on durable models like the Acadia, Enclave, Envision, or Sierra 1500, small paint damage needs care. Why It’s Important to Act Fast Stops rust before it starts Keeps the paint from peeling more Makes the surface look clean and smooth Helps protect resale value How to Handle Chips and Scratches You don’t need to be a pro to patch up small flaws. Use this car paint fix guide as a simple path: Clean the area: Use water and mild soap. Dry it with a clean cloth. Use touch-up paint: Match your car’s color code. Use a fine brush or pen for the best look. Apply in thin layers: Let each coat dry before you add more. Two to three coats may be best. Seal with clear coat: Once dry, use a clear coat to seal the fix and help it blend. Buff lightly: When the clear coat is dry, use a soft cloth to smooth the finish. By patching chips fast, you save time and money. You also help keep your vehicle’s shine strong. If you’re near Orlando and need help, reach out to Phillips Buick GMC. We’re happy to walk you through it or handle it for you. 5. Seek Professional Help for Extensive Peeling When paint starts to peel on a large part of your car, a quick fix might not be enough. At that point, it's best to call in a trained pro. A skilled paint shop can assess the damage and tell you what needs to be done. If too many layers are gone or the metal is bare, a full repair is the safest path. It takes tools and skill to bring back the look and protect the body. At Phillips Buick GMC’s Collision Center and Body Shop, we specialize in paint repair solutions—from correcting minor chips to performing complete refinishing jobs. Whether your vehicle needs spot treatment or a total refresh, our certified technicians provide the attention to detail your vehicle deserves. Signs You Should Call a Pro Peeling covers more than one small area Bare metal is showing Clear coat is flaking across the hood or roof You’ve tried to fix it, but the damage got worse You want the paint to match and look smooth again What a Shop Will Likely Do Sand the peeling areas Remove old or damaged layers Prime the surface Apply color-matched paint Seal with a fresh clear coat Shops that know how to fix paint peeling car problems can handle jobs that go far past touch-up paint. They often follow a car paint fix guide tailored for full coverage. Whether you drive an Acadia, Enclave, Envision, or Sierra 1500, a pro paint job helps your car look like new again. For peeling paint repair that lasts, don’t wait too long. The sooner you act, the better the end result. What causes car paint to peel, and how can I prevent it? Car paint can peel due to various factors, including poor surface preparation, exposure to harsh weather, or prolonged sun damage. To prevent peeling, ensure proper maintenance, such as washing and waxing your car regularly, and addressing any minor chips or scratches right away to avoid further damage. Do I need professional help to fix large peeling areas? Yes, for large or extensive peeling areas, it's best to seek professional help. A professional can properly assess the damage and ensure a lasting repair, especially if the peeling is widespread or affects multiple layers of paint. Will a DIY paint repair kit provide a long-lasting solution? A DIY paint repair kit can offer a temporary fix for minor peeling, but it may not provide a long-lasting solution. The repair might not match the original paint texture and can wear out quickly without proper tools or skills. For better results, especially with large areas, professional restoration is recommended. Get Directions to Phillips Buick GMC Disclaimer: All information is provided for general informational and entertainment purposes only. While we strive for accuracy, we cannot guarantee that all content is complete, current, or error-free. Any reliance you place on such information is strictly at your own risk. This article may include opinions and is not endorsed by, or officially affiliated with, any vehicle manufacturer or brand. Always consult official sources – such as the vehicle’s owner’s manual, authorized dealerships, or certified professionals – for the most up-to-date and personalized information. Keep Your Car in Mint Condition with Phillips Buick GMC If you’re ready to take care of any peeling paint issues or explore the full selection of Buick and GMC vehicles, Phillips Buick GMC is here to help. Whether you're from Orlando, Claremont, Winter Garden, or Groveland, we invite you to visit our dealership and check out our wide range of vehicles, including the Acadia, Enclave, Envision, and Sierra 1500. Additionally, if you're looking to keep your vehicle in top shape, you can find helpful guides on routine maintenance like how to rotate the tires on your 2025 GMC Acadia, 2025 GMC Terrain, and 2025 GMC Yukon. We also offer a range of services to help with body repairs and maintenance, ensuring your car stays in great condition. For more information, visit our body shop page to see how we can assist you. Don't hesitate to contact us for any questions, and feel free to explore our services and vehicles further. Our friendly team is ready to assist you in keeping your car looking and running its best!

Mother Adjusting Car Seat Straps for her toddler son in the back seat of her car

Adjusting Uneven Car Seat Straps: The Complete Guide

When it comes to keeping your child safe on the road, there’s no room for shortcuts—especially when it comes to car seat straps. Uneven harnesses or twisted seat belts can turn everyday drives around Orlando, Claremont, Winter Garden, or Groveland into potential safety risks. Whether you're buckling up your toddler in a GMC Sierra 1500 or settling your baby into the backseat of a Buick Enclave, properly aligned straps make all the difference. Misaligned or twisted straps can reduce the effectiveness of your car seat during sudden stops or impacts. That's why knowing how to adjust uneven car seat straps isn’t just a parenting tip—it’s a must-have skill for every driver. At Phillips Buick GMC, we care about more than just the vehicle you drive; we care about how safely your family rides. If you're unsure about your car seat setup or want expert guidance tailored to your Buick or GMC model, don't hesitate to stop by or contact our team. 1. Take your child out of the seat Before you begin to fix any strap issue, the first step is simple: take your child out of the car seat. This may seem obvious, but it’s one of the most overlooked steps when trying to adjust uneven car seat straps. When your child is still in the seat, the straps are stretched and under pressure. That makes it hard to see what’s going wrong. Even more, it can lead to poor fixes that don’t last. Removing your child gives you full access to the harness and allows you to check the straps for twists, slack, or misalignment. Here’s why clear access matters: You can spot if the strap is twisted or stuck under the seat. You can gently pull each strap to check for trapped fabric. You have room to fully loosen the harness for a full reset. Whether you're working inside a GMC Acadia, Buick Envision, or even a Sierra 1500, space can be tight. Removing your child lets you work with more room, especially in smaller second rows or behind the driver’s seat. Once the seat is clear, follow these quick tips: Pull both harness straps outward and upward Check both sides for even length and tension Look closely at the back of the seat for slack that may be trapped This small step lays the groundwork for a proper seat strap reposition. It's also the first move in any reliable car seat strap guide. Skipping this step can lead to poor results when trying to fix seat belt alignment. For families in Claremont or Winter Garden, where quick trips are common, fast fixes often miss key steps. Don't rush—start smart. Making the time to reset your straps the right way is how you keep your Enclave or Envision as safe as it is stylish. 2. Locate the adjustment mechanism Once your child is safely out of the seat, it’s time to find the adjustment point. This part controls how tight or loose the harness straps are. To properly adjust uneven car seat straps, you need to know where this mechanism is and how it works. Most car seats have the strap adjuster in one of three places: Front of the seat: Usually under a small flap between your child’s legs Back of the seat: Near where the harness feeds through the seat shell Under the seat pad: Some models hide the mechanism under the fabric You may need to move cushions or flaps to reach the mechanism. That’s normal. In a roomy SUV like the Buick Enclave or GMC Acadia, you’ll have more space to do this. Compact models like the Envision may need a little more care when reaching in tight spots. Once you find it, look for these features: A button, lever, or pull tab A visible strap feed for both left and right harness straps A solid click or hold when pulled or pressed This is where you’ll start to fix seat belt alignment and reset the balance between the two sides. If the straps are not moving evenly, the problem might be right here. A good car seat strap guide will show you how your brand’s system works. But most work in a similar way: press the adjuster and pull the straps out to loosen them. Tip: If you’re working in the back of a Sierra 1500, fold the seat up for more space. This gives you better reach for seats installed in the middle row. Finding and using the adjustment mechanism is one of the best ways to reposition seat straps quickly. It’s also the key to long-term fixes—not just a one-time patch. 3. Fully loosen the harness Once you've found the adjustment point, the next step is to fully loosen the harness. This makes it easier to spot problems and reposition seat straps the right way. Tight straps can hide slack, twists, or uneven pulls that cause issues during daily use. To adjust uneven car seat straps correctly, start with a clean slate. That means zero tension. Follow these simple steps: Press or lift the adjuster lever or button. While pressing, pull both shoulder straps forward—gently but firmly. Keep pulling until the harness feels fully loose and moves without drag. This gives you full range to work with the straps. You’ll now be able to check the harness path and make sure nothing is stuck or out of place. Many families around Orlando and nearby towns like Winter Garden or Groveland prefer roomy vehicles like the Acadia or Enclave. These models make it easier to move around while working on car seats. But even in the more compact Envision, fully loosening the harness gives you enough space to fix seat belt alignment with ease. Remember: Both straps should move freely. You should be able to lift each one without strain. The harness should sit evenly on both sides. If you still feel resistance after loosening the harness, check under the seat. Some slack might be trapped behind the padding or near the buckle. A good car seat strap guide will show you exactly where to look. This step makes the rest of the process smoother. It’s a small move with a big impact—and it sets you up for a safer, more even fit whether you drive a Sierra 1500 or a daily-use SUV. 4. Check for slack trapped behind the seat Even when the harness looks loose, hidden slack can stop you from getting a snug, safe fit. One of the most common issues when trying to adjust uneven car seat straps is slack hiding behind or under the seat padding. This slack makes one side tighter than the other, even if you’ve already loosened the harness. Here’s how to check for trapped slack: Reach behind the car seat, where the straps feed through. Gently pull the straps from the back to remove any bunching. Check near the buckle area—slack often gets caught here. Run your fingers under the seat padding and harness path. When slack is stuck out of sight, it causes the harness to pull unevenly across the child’s chest or shoulders. This makes it harder to fix seat belt alignment and can lead to a poor fit, even if the rest of the seat is set up well. If you're driving a larger vehicle like the Acadia, Enclave, or Sierra 1500, you'll have a bit more room to move around while making these adjustments. In a smaller SUV like the Envision, take extra care to reach fully behind the seat. A compact layout might require you to move the car seat slightly forward for better access. Look for help in the car seat strap guide included with your seat. Most manuals will show you where slack tends to hide and how to free it. Once slack is gone, you’ll have a clear path to seat strap reposition success. This step helps make sure both straps tighten the same way—an essential part of keeping your child safe on every drive. 5. Fix seat belt alignment Fixing seat belt alignment is one of the most important parts of car seat safety. If the belt does not line up right, it won’t protect your child the way it should. The belt must sit flat, snug, and even on both sides. This step helps prevent the need to adjust uneven car seat straps later on. To fix seat belt alignment, follow these steps: Make sure the straps come through the same slot on each side. The shoulder straps should sit at or just below your child’s shoulders (rear-facing). For forward-facing seats, straps should be at or just above the shoulders. The lap part of the belt should rest flat over the hips—not the belly. Use your car seat strap guide to check each belt path. These diagrams show the right height and slot for your child’s size. In roomy SUVs like the Acadia or Sierra 1500, it’s easier to crouch and get a close look at the belt angle. Smaller vehicles like the Envision or Enclave may take more patience, but the process is the same. Check that the belt is not: Twisted Loose on one side Tucked under padding Bunched behind the seat Once you line the belt up right, you can seat strap reposition if needed. If one side still pulls tighter, adjust until both sides move smooth and snug. Keep each ride safe by checking the belt’s fit each time you buckle in. 6. Re-tighten the harness Once you've checked for slack and fixed the seat belt alignment, it's time to re-tighten the harness. Properly tightening the harness ensures your child is secure and comfortable. Loose straps can reduce the effectiveness of the seat, while overly tight straps can cause discomfort. Here’s how to re-tighten the harness: Pull the harness straps: After you’ve positioned the straps properly, pull the harness adjuster to tighten them. Ensure they fit snugly across your child’s chest and hips. Check the snugness: You should be able to fit only one finger between the strap and your child’s chest. If you can fit more, it’s too loose. Even the straps: Make sure both shoulder straps are evenly tightened. You want the straps on each side to pull with equal force, without one side being looser than the other. Use the car seat strap guide: Follow the manufacturer’s guide to adjust the straps for your child's specific size. Some models, like the Acadia or Enclave, may have a simple pull-and-tighten system for added convenience. Re-check the seat belt: After tightening the harness, check the seat belt for slack and adjust it if necessary. The seat should stay secure and won’t shift around during a ride. In vehicles like the Sierra 1500 or Envision, ensure that the seat fits properly, as these cars offer more space and different configurations. Even with more room, the process remains the same. When you re-tighten the harness, you’re ensuring your child’s safety on every trip, no matter where you drive. How do I diagnose if my seat straps are truly uneven or twisted? To diagnose uneven or twisted seat straps, fully loosen the harness and inspect the straps for slack or twists. Gently pull each strap to see if one side is longer or shorter than the other. Look for any twists in the straps that could affect alignment. Can I easily fix seat strap alignment myself or should I see a mechanic? You can typically fix seat strap alignment yourself by following a few simple steps: loosen the harness, check for slack or twists, and reposition the straps. If the straps are still misaligned after these steps or if you’re unsure about the proper adjustments, it may be a good idea to consult a professional or refer to the car seat’s manual. Are certain car seat models more prone to strap misalignment? Yes, some car seat models can be more prone to strap misalignment due to design issues or the way the straps are threaded. Always follow the car seat manufacturer’s instructions for proper installation and adjustments. Regularly checking for alignment can help prevent problems. Keep You and Your Passengers Safe with Phillips Buick GMC We hope this guide has helped you understand how to adjust uneven car seat straps and ensure your child’s safety. If you need more help or have any questions, don't hesitate to contact Phillips Buick GMC. Our expert team is here to assist you, and we invite customers from Orlando, Claremont, Winter Garden, and Groveland to explore our wide selection of vehicles, including the 2025 GMC Acadia, Enclave, Envision, and Sierra 1500. Whether you're looking for a family-friendly SUV or a powerful truck, we have the perfect vehicle for your needs. In addition to car seat adjustments, we offer a wealth of useful resources on our site. Check out our recent article on seating capacities in the 2025 GMC lineup to find the best fit for your family. If you’re considering a used truck, be sure to read 10 things to look for and avoid when buying a used truck to make an informed decision. And if you’ve encountered any issues with your GMC, our GMC error response codes guide offers helpful tips on how to fix them.

2025 GMC Terrainn SUV exterior in black up front

How to Rotate the Tires on Your 2025 GMC Acadia

Keeping your 2025 GMC Acadia running smoothly isn’t just about oil changes and engine checks—your tires need attention too. Regular tire rotation is one of the simplest, most effective ways to extend the life of your tires, improve fuel efficiency, and ensure a safer ride around Leesburg, Yalaha, and beyond. Whether you're navigating the winding roads of Weirsdale or cruising through Rutland, properly rotating your tires helps maintain the balance and performance your Acadia was built for. In this guide, we’ll walk you through exactly how to rotate the tires on your 2025 GMC Acadia, step by step. And if you’d rather leave it to the pros, the service team at Phillips Buick GMC is here to help—just give us a call or stop by today. Prepare to Rotate the Tires on Your Acadia Getting ready to rotate tires on your GMC Acadia 2025 is simple with the right tools and a safe spot to work. A little prep can make the job much faster and safer. Before you start, be sure you have: A jack to lift the Acadia Jack stands to hold the SUV up A lug wrench to take off the wheels A tire gauge to check air pressure Chalk or wheel blocks to stop roll Pick a flat, hard spot to park. A driveway in Leesburg or a garage in Yalaha works well. Make sure the ground is dry and even. Wet spots can cause slips. Here are some steps to take before you start the tire rotation on your Acadia: Park the SUV and set the brake Turn the engine off and take the keys out Block the wheels that will stay on the ground Loosen the lug nuts a bit before you lift the car Wear gloves and closed shoes to stay safe. Check your tools to make sure they are strong and clean. Good prep work is key to easy tire care. When you take the time to set up right, your tire rotation will go smooth. You will also help make sure your Acadia tire maintenance gives you the best results. Step-by-Step Guide to Rotating Tires on a GMC Acadia If you want to rotate tires on your GMC Acadia 2025 at home, follow these easy steps. A good tire rotation helps your Acadia tire maintenance plan stay on track. 1. Park and Prep Your Acadia Park on a flat, solid spot. Set the brake and block the back wheels. Gather your jack, stands, and wrench. 2. Loosen the Lug Nuts Use the lug wrench to loosen each nut a little. Do not take them off yet. 3. Lift the Acadia Place the jack under the right point of the SUV frame. Lift the tire off the ground. Set the jack stand under the frame and lower the car onto it. 4. Remove the Tires Take off each lug nut. Pull the tire off the hub. Place the tire flat on the ground to keep it safe. 5. Rotate the Tires Use the right tire rotation pattern for your 2025 GMC Acadia. If your Acadia is front-wheel drive: Move the front tires to the back on the same side. Cross the back tires to the front. If your Acadia is all-wheel drive: Cross the tires from front to back and back to front. 6. Put the Tires Back On Line up the holes on the tire with the studs on the hub. Hand-tighten the lug nuts as much as you can. 7. Lower the Acadia Use the jack to lift the SUV off the stand. Take the stand out and lower the tire to the ground. 8. Tighten the Lug Nuts Tighten each nut in a star pattern. This keeps the tire even on the hub. 9. Check Tire Pressure Use a tire gauge to check each tire. Add air if needed to reach the right pressure. When you rotate tires on your GMC Acadia 2025 the right way, you help your SUV drive better and stay safe. Good tire rotation on your Acadia also helps you save money over time. How Important Are Tire Rotations? Tire care is a big part of keeping your 2025 GMC Acadia in top shape. When you rotate tires on your GMC Acadia 2025, you help your car stay safe, smooth, and strong. Regular tire rotation for your Acadia is a small task that makes a big change. Tires wear down over time. But they do not all wear at the same speed. Front tires often wear faster than back tires, especially when turning and braking. If you skip tire rotation, you risk uneven wear. This can lead to: Poor grip on wet or rough roads Less control when you turn or stop Lower gas mileage Shorter tire life By following a good schedule for Acadia tire maintenance, you keep tire wear even. This helps your tires last longer. It also helps your Acadia ride the way it should, no matter if you are driving through Leesburg or Yalaha. Here’s why tire rotation matters for your Acadia: Better safety: Tires with even wear give you more grip on the road. Smooth drive: Your GMC will feel better to steer and brake. Save money: Tires that last longer mean fewer trips to buy new ones. Good gas mileage: Even tires help your Acadia move with less work. Good tire care also protects other parts of your Acadia. Bad tires can strain the brakes and shocks. Over time, this can mean costly repairs. In short, tire rotation is one of the best ways to protect your 2025 Acadia. Make tire rotation part of your regular upkeep. Whether you're driving through Rutland, Haines Creek, or Weirsdale, it will help you get the best out of every mile. Changing the Tires on a FWD vs AWD Acadia Before you rotate tires on your GMC Acadia 2025, it helps to know what your SUV needs. The Acadia is built for smooth rides and strong road grip. But to keep it that way, tire care must be a top task. The 2025 Acadia may come with front-wheel drive (FWD) or all-wheel drive (AWD). The type you have changes how your tires wear. FWD Acadias: Front tires wear faster since they pull most of the weight. AWD Acadias: All tires wear more even, but still need to be rotated often. Tire rotation for an Acadia is not one-size-fits-all. The way you drive around Leesburg or Rutland can speed up tire wear too. If you take sharp turns or hit rough roads in Yalaha or Weirsdale, you may need to rotate more often. Here are some signs that it’s time for a tire rotation on your Acadia: Car pulls to one side when you drive Tires look worn more on one side You hear new sounds when you drive Steering feels stiff or loose Good acadia tire maintenance helps you catch these signs early. It can also help you stop small problems from getting worse. When you rotate tires on your GMC Acadia 2025, you help keep its strong, smooth feel on every road. Whether it’s the smooth streets of Haines Creek or the open roads near Weirsdale, tire care helps your Acadia handle them all with ease. How Often Should You Rotate Your GMC Acadia's Tires? Knowing when to rotate tires on your GMC Acadia 2025 is key to safe and smooth drives. Good timing helps stop bad wear and keeps your ride strong. In most cases, you should plan a tire rotation for your Acadia every 5,000 to 7,500 miles. But check your owner's book to be sure. Some roads near Leesburg, Rutland, or Haines Creek may call for sooner care. Here are a few times when you should think about tire rotation for your Acadia: After every oil change If you feel odd shakes while you drive When you spot uneven wear on tires Before long trips through Yalaha or Weirsdale Driving style also plays a part. If you drive fast, take sharp turns, or often haul heavy loads, you may need more tire care. Hard stops and starts can speed up tire wear too. Good Acadia tire maintenance is not just about how far you drive. It’s also about how you drive. Even calm trips can take a toll on tires over time. Making tire rotation a habit helps keep your 2025 Acadia in its best shape. It protects your tires, saves you money, and gives you peace of mind on every road. Common Mistakes to Avoid During Acadia Tire Maintenance Good tire care helps your Acadia stay safe and smooth. But even small slip-ups can cause big problems later. When you rotate tires on your GMC Acadia 2025, keep these points in mind. Skipping Regular Tire Rotations Waiting too long between tire rotation Acadia services can wear tires out fast. Rotate your tires every 5,000 to 7,500 miles. Using the Wrong Rotation Pattern Front-wheel and all-wheel drive need different patterns. Follow the right one for your Acadia. Not Checking Tire Pressure Tires lose air over time. Check pressure after you rotate tires to keep them safe and smooth. Overtightening or Undertightening Lug Nuts Lug nuts should be snug but not too tight. Tighten in a star shape to spread the pressure. Skipping a Tire Check Always check for cuts, cracks, or bald spots. Bad tires can hurt how your Acadia drives. Not Using the Right Tools A poor jack or wrench can slip and cause harm. Always use gear made for tire work. Forgetting to Reset Tire Sensors Some Acadia models have tire pressure sensors. After a tire rotation, reset them if needed. By staying sharp and avoiding these mistakes, your Acadia tire maintenance plan will stay on track and strong. When in doubt, it is always smart to reach out to experts who know how to rotate tires GMC Acadia 2025 the right way. How do I determine the correct rotation pattern for my 2025 GMC Acadia? The 2025 GMC Acadia uses a front-wheel-drive based platform. Use a forward cross pattern unless it is an all-wheel drive model, which would use an X-pattern. Does trim level or wheel size impact the rotation frequency? No, trim level or wheel size does not change how often you should rotate the tires. Follow the standard 5,000 to 7,500-mile schedule. Are there any specific tools needed for lifting the Acadia safely? Yes, use a hydraulic floor jack rated for SUVs and a set of sturdy jack stands. Taking time to learn these details helps you protect your tires, keep your drive smooth, and stay safe on the road. Get Your Terrain's Tires Rotated at Phillips Buick GMC If you have more questions about tire care or need help with your 2025 Acadia, we are here for you. The team at Phillips Buick GMC is proud to serve drivers from Leesburg, Yalaha, Rutland, Haines Creek, and Weirsdale. We invite you to visit us and explore our wide selection of vehicles, including the newest Acadia models. Our staff is ready to help you find the right fit for your needs. If you want to learn more about tire care, you can also find tips for rotating the tires on a 2025 Buick Envista, rotating the tires on a 2025 Buick Envision, and rotating the tires on a 2025 Buick Encore GX. No matter what you drive, we have the tools and advice you need. Visit our tire center to get started today.

2025 GMC Acadia SUV exterior parked in front of the ocean in blue

How to Rotate the Tires on Your 2025 GMC Terrain

When it comes to maintaining your 2025 GMC Terrain, tire rotation is a simple but essential task that often gets overlooked. Not only does it ensure your tires wear evenly, but it also helps extend their lifespan, giving you better traction on roads throughout Leesburg, Yalaha, Rutland, Haines Creek, and Weirsdale. Whether you're looking to handle the job yourself or prefer to leave it to the experts, knowing how to rotate the tires on your Terrain is key to keeping it running smoothly. In this guide, we’ll walk you through everything you need to know about tire rotations, why they matter, and how Phillips Buick GMC can help keep your Terrain in top shape. Ready to get rolling? Let’s dive in! How to Rotate Your GMC Terrain's Tires: Step-by-Step Rotating the tires on your GMC Terrain is an essential part of terrain tire care. It’s a simple process that can extend the life of your tires and improve your vehicle's performance. Here’s a step-by-step guide to help you rotate the tires yourself or understand what happens when you bring your vehicle in for service. 1. Gather Your Tools Before you begin, make sure you have everything you need: A jack Jack stands A lug wrench A torque wrench 2. Lift the Vehicle Start by parking your Terrain on a flat surface and engage the parking brake. Use the jack to lift one corner of the vehicle at a time. Make sure the car is securely lifted before moving on. 3. Remove the Tires Use the lug wrench to remove the lug nuts on the tires. Keep the lug nuts in a safe spot for later reinstallation. 4. Rotate the Tires The tire rotation pattern will depend on whether your Terrain is front-wheel drive, rear-wheel drive, or all-wheel drive. Here’s a basic idea: Front-Wheel Drive (FWD): Swap the front tires with the rear tires on the opposite sides. Rear-Wheel Drive (RWD): Swap the rear tires with the front tires on the opposite sides. All-Wheel Drive (AWD): Rotate the tires front to back and side to side. 5. Reinstall the Tires Place each tire back on its designated wheel hub. Hand-tighten the lug nuts on each tire, then use the torque wrench to tighten them to the manufacturer’s recommended torque. 6. Lower the Vehicle Carefully lower the vehicle back to the ground using the jack. Double-check that all the lug nuts are properly tightened. 7. Check Tire Pressure After rotating your tires, check the air pressure to make sure it’s within the recommended range. Proper tire pressure is crucial for handling and safety. 8. Test Drive Your Car Once the rotation is complete, take your Terrain for a short drive. Pay attention to how the vehicle handles and listen for any unusual sounds. If anything feels off, check the tire installation again or bring your vehicle to a professional. If you'd rather leave the tire rotation to the experts, bring your Terrain to Phillips Buick GMC. Our team is here to help with tire rotations and other essential terrain tire care needs. Regular rotations will keep your vehicle running smoothly for ye Are Tire Rotations Important? Tire rotations are one of the most important aspects of terrain tire care. Regularly rotating the tires on your 2025 GMC Terrain can make a huge difference in how well your vehicle performs. Without this simple maintenance, your tires will wear unevenly, affecting your car’s safety, handling, and fuel efficiency. Here’s why rotating the tires on your Terrain is so important: Even Tire Wear: When you rotate your tires, you ensure that all four wear at the same rate. Without rotation, the front tires tend to wear faster than the rear ones. Uneven tire wear can cause one or more tires to wear out prematurely. Improved Traction: Proper tire rotation helps maintain consistent traction. When your tires wear evenly, they grip the road better, providing better control of your Terrain—especially in wet or slippery conditions. Extended Tire Life: Regular rotations help your tires last longer. With even wear, they won’t need replacing as often, saving you money in the long run. Improved Fuel Efficiency: Tires that are worn unevenly can lead to poor fuel efficiency. By keeping your tires in top condition with routine rotations, your Terrain runs more smoothly, which can help improve your gas mileage. Avoiding Unnecessary Repairs: Rotating your tires regularly can also prevent other issues like misalignment or suspension problems. By catching potential issues early, you can avoid costly repairs down the road. Overall, tire rotation is a key part of routine maintenance for your Terrain. It’s a small step that makes a big difference in the performance, safety, and longevity of your vehicle. Regularly rotating your tires ensures that your GMC Terrain stays in top shape, ready for anything the road throws at it. If you're unsure when to rotate the tires on your 2025 GMC Terrain or want professional help, visit Phillips Buick GMC. Our service experts are here to keep your vehicle running like new. How Often Should You Rotate the Tires on Your GMC Terrain? Regular tire rotation is a crucial part of terrain tire care. But how often should you rotate the tires on your 2025 GMC Terrain? The answer depends on several factors, including the type of terrain you drive on and your vehicle’s drivetrain. Here’s a general guide: For Front-Wheel Drive (FWD): If your Terrain has front-wheel drive, rotate the tires every 5,000 to 7,500 miles. This helps ensure even wear since the front tires do more work when turning and braking. For Rear-Wheel Drive (RWD): If your GMC Terrain is rear-wheel drive, aim for the same 5,000 to 7,500-mile range. Since the rear tires bear more of the load, rotating them regularly ensures they don’t wear down faster than the front tires. For All-Wheel Drive (AWD): If your Terrain has all-wheel drive, the tires wear more quickly because all four tires are engaged. Rotate them more frequently—around every 3,000 to 5,000 miles—for the best results. Tire Type: If your Terrain uses specialized tires, like directional or non-directional tires, be sure to follow the manufacturer’s guidelines for rotation. Directional tires, for example, should only rotate in one direction, so make sure to account for that when you rotate tires on your GMC Terrain. In general, rotating your tires every 5,000 to 7,500 miles is a safe bet for most 2025 GMC Terrain models. However, always check your owner's manual for any specific recommendations related to your vehicle. By sticking to this schedule, you’ll ensure that your Terrain continues to run smoothly and safely for miles to come. If you're unsure when it’s time for your next tire rotation or need expert help, stop by Phillips Buick GMC. Our team is always ready to assist with tire rotation and other essential maintenance for your Terrain. What Pattern Should You Follow When Rotating Your Tires Rotating your tires is a key part of terrain tire care. It helps ensure even wear and improves the performance of your vehicle. However, the pattern in which you rotate the tires depends on the type of drive your GMC Terrain has. Understanding the correct pattern is important for the best results. 1. Front-Wheel Drive (FWD) Vehicles If your Terrain is front-wheel drive, the tires wear differently. To rotate the tires: Move the front tires to the rear, but switch sides (left front to right rear, right front to left rear). The rear tires move straight to the front (left rear to left front, right rear to right front). 2. Rear-Wheel Drive (RWD) Vehicles For rear-wheel drive vehicles, the process is a bit different: Move the rear tires to the front, switching sides (left rear to right front, right rear to left front). The front tires move straight to the rear (left front to left rear, right front to right rear). 3. All-Wheel Drive (AWD) Vehicles If your Terrain is all-wheel drive, follow this pattern: Rotate the front tires straight to the rear (left front to left rear, right front to right rear). Move the rear tires to the front, but switch sides (left rear to right front, right rear to left front). 4. Unidirectional Tires Some tires have a specific direction they should roll in. If your Terrain uses these tires, it’s important to rotate them in the correct direction. The pattern is the same as for other vehicles, but the tires must be moved in a way that follows the rolling direction. Knowing the correct tire rotation pattern for your Terrain ensures better tire care and longer-lasting performance. Regularly rotating your tires helps improve handling, increase fuel efficiency, and extend the life of your tires. If you're unsure about which pattern to use, or if you'd prefer professional assistance, contact Phillips Buick GMC for expert advice and service. Our team is here to help with all your terrain tire care needs. Maintaining Your Terrain's Tires Beyond Rotation Rotating your tires is just one part of keeping your GMC Terrain in top shape. Regular maintenance beyond tire rotation can help your tires last longer and perform better. Proper tire care ensures that your vehicle runs smoothly, and that your tires stay safe and effective on the road. Here are a few key tips for maintaining your Terrain’s tires: Check Tire Pressure Regularly: Tires lose pressure over time. Low pressure can lead to uneven wear and poor handling. Make sure to check the pressure monthly and inflate to the recommended level. Inspect Tires for Damage: Look for cuts, punctures, or bulges in your tires. Damaged tires can be unsafe. If you find any, get them inspected by a professional. Ensure Proper Alignment: Misalignment can cause tires to wear unevenly, even if you rotate them regularly. Have your alignment checked during routine service to avoid unnecessary wear. Balance Tires: Unbalanced tires can cause vibrations and uneven wear. It’s a good idea to have your tires balanced during each rotation to ensure a smoother ride. Monitor Tread Depth: Worn tread can reduce traction and safety. Check the tread depth regularly. If it's too low, it may be time for new tires. By following these simple steps, you’ll help extend the life of your Terrain's tires. Regular tire maintenance, along with rotating your tires, keeps your vehicle running smoothly and safely. For all your tire needs, visit Phillips Buick GMC. Our expert team is here to help with all aspects of terrain tire care. Why Phillips Buick GMC is Your Resource for Tire Services While regular tire rotation is an essential part of terrain tire care, sometimes it’s best to leave it to the professionals. When you're unsure of the process or simply prefer expert help, visiting Phillips Buick GMC is a great choice. Our team is ready to ensure that your tires are properly rotated and well-maintained. Here are a few reasons to visit us for tire rotation services: Expertise: Our technicians are trained to handle the specific needs of your vehicle. We know exactly how to rotate tires on your GMC Terrain to ensure maximum performance and longevity. Convenience: Bring your Terrain to us for quick and efficient tire rotation. We have the right tools and equipment to get the job done right. Peace of Mind: If you’re unsure about how to rotate tires on your GMC Terrain or are worried about wear, let our experts handle it. We’ll make sure your tires last longer and wear evenly. Comprehensive Service: In addition to rotating your tires, we’ll check for any other issues that could affect your vehicle’s performance. It’s recommended to rotate your tires about every 6,000 to 8,000 miles, or as indicated in your owner's manual. If you notice any signs of uneven tire wear or reduced vehicle handling, it's time to visit Phillips Buick GMC. Our service department is always ready to assist with all your terrain tire care needs. When you're ready for your next tire rotation, or if you have any concerns, give us a call or stop by. Our team will ensure that your GMC Terrain gets the best care possible. What is the recommended mileage interval for rotating tires on a 2025 GMC Terrain? The recommended mileage interval for rotating tires on a 2025 GMC Terrain is every 6,000 to 8,000 miles, or as specified in the owner's manual. Can uneven tire wear be fixed by rotating, or do I need an alignment? Uneven tire wear cannot always be fully corrected by rotation. If the wear is due to misalignment or suspension issues, you will need a professional alignment to fix it. Should I rotate the tires on my Terrain if they’re directional or asymmetric? Yes, you can rotate the tires on your GMC Terrain if they are directional or asymmetric, but the rotation pattern may need to be adjusted to maintain the tire’s performance and safety. Consult your owner’s manual or a professional to determine the best method for these types of tires. If you need any further details or clarification, feel free to reach out to Phillips Buick GMC for expert advice on tire care for your Terrain. Get Expert Care for Your GMC Terrain's Tires at Phillips Buick GMC Maintaining your 2025 GMC Terrain's tires is essential for both safety and performance. If you're looking for expert advice on tire care, feel free to reach out to Phillips Buick GMC. Our team is here to assist with all your maintenance needs. If you’re from Leesburg, Yalaha, Rutland, Haines Creek, or Weirsdale, be sure to check out our wide selection of vehicles, including the 2025 GMC Terrain. Whether you’re in the market for a new car or just want to learn more about maintaining your current ride, we’ve got you covered. While you’re here, don’t miss our helpful resources. You can find more information on how to care for your vehicle, including posts like How to Rotate the Tires on Your 2025 GMC Sierra 1500 and How to Rotate the Tires on Your 2025 GMC Canyon. Need to know how far you can go on a full tank of gas in your Buick Enclave? We’ve got that covered too. Visit us or our site to explore all the useful tips and vehicle options available. Feel free to contact us if you need assistance with tire rotation or have any questions about your GMC Terrain. We’re here to help!

2025 GMC Yukon badging on the rear with the GMC Logo

How to Rotate the Tires on Your 2025 GMC Yukon

Owning a 2025 GMC Yukon means you're driving a vehicle designed for performance, comfort, and reliability. But just like any well-oiled machine, keeping it in top shape requires regular maintenance. One crucial task you can’t afford to overlook is tire rotation. Whether you're cruising through Leesburg or tackling the winding roads near Yalaha, rotating your tires regularly is key to extending their life, improving handling, and maintaining your vehicle’s safety. In this guide, we’ll walk you through the simple steps to rotate the tires on your 2025 GMC Yukon and ensure your ride stays smooth and safe. And if you're not up for the job, the expert team at Phillips Buick GMC is here to help. Let’s dive in! How to Rotate Your GMC Yukon's Tires: Step-by-Step Rotating the tires on your 2025 GMC Yukon is a simple process that can be done at home with the right tools. Here’s a clear step-by-step guide to help you perform a tire rotation Yukon efficiently and safely. 1. Prepare the Vehicle Before you start, make sure your vehicle is parked on a flat surface. Engage the parking brake to prevent any accidental movement. 2. Loosen the Lug Nuts Using a lug nut wrench, loosen the lug nuts on all four tires. Don’t remove them completely yet—just break the seal to make the next steps easier. 3. Lift the Vehicle Use a car jack to lift the vehicle off the ground. Ensure the car is secure and stable before moving on. 4. Place Jack Stands Once the vehicle is lifted, place jack stands under the frame for extra safety. Never rely solely on the car jack to hold the weight of your vehicle. 5. Remove the Tires Carefully remove the tires one by one. Set them aside in a safe, organized manner. 6. Rotate the Tires Now, it’s time to rotate tires GMC Yukon 2025. Follow the rearward cross pattern: Left Rear to Right Front Right Rear to Left Front Right Front to Left Rear Left Front to Right Rear 7. Mount the Tires Place each tire in its new position on the wheel mounts. Hand-tighten the lug nuts to secure the tires. 8. Lower the Vehicle Carefully lower the vehicle back to the ground using the car jack. 9. Final Tightening Once the vehicle is fully lowered, tighten the lug nuts. Use a star pattern for even tightening, going diagonally across the tires. 10. Check Tire Pressure After the rotation, check the tire pressure of each tire. Adjust as needed to ensure optimal performance. By following these steps, you’ll be able to rotate your tires GMC Yukon 2025 effectively and maintain a smooth, safe ride. Keep track of your Yukon tire schedule to ensure you stay on top of regular maintenance. Are Tire Rotations Important? Tire rotation is an essential part of keeping your 2025 GMC Yukon running smoothly. It helps ensure that your tires wear evenly, which improves safety, performance, and the lifespan of your tires. Without regular rotation, certain tires can wear out faster than others, leading to uneven handling and more frequent replacements. Here’s why regular tire rotation is so important: Even Tire Wear: Tires naturally wear down at different rates depending on their position. The front tires often wear faster due to steering and braking, while rear tires can wear more evenly. Rotating your tires helps balance this out, ensuring they wear at a similar pace. Improved Handling: Uneven tire wear can cause your vehicle to pull to one side, affecting the way it drives. By regularly rotating your tires, you maintain balanced handling and smoother rides. Extended Tire Life: When you rotate the tires on your Yukon, you’re giving them a chance to wear more evenly. This can extend the life of each tire and delay the need for replacements. Enhanced Safety: Tires with uneven wear are more prone to blowouts or reduced traction. Regular tire rotation reduces these risks, ensuring that your Yukon’s tires provide consistent performance on every drive. By following the Yukon tire schedule for tire rotation, you can avoid costly repairs and keep your vehicle in peak condition. Regular rotations also help maintain your vehicle’s warranty and keep it running efficiently, saving you time and money in the long run. Where Should You Move Each Tire During a Rotation? When it comes to rotating the tires on your 2025 GMC Yukon, it's important to follow the correct pattern to ensure proper wear. The Yukon tire schedule suggests a rearward cross pattern for rear-wheel drive vehicles like the GMC Yukon. This pattern is designed to maximize tire performance and safety. Here’s how it works: Left Rear to Right Front: Move the left rear tire to the right front position. Right Rear to Left Front: Move the right rear tire to the left front position. Right Front to Left Rear: Move the right front tire to the left rear position. Left Front to Right Rear: Move the left front tire to the right rear position. This tire rotation Yukon method helps balance the wear between the front and rear tires, especially for rear-wheel drive vehicles. It ensures the tires wear more evenly and improves the overall performance of your vehicle. Keep in mind that this pattern is best for non-directional tires. If your 2025 GMC Yukon has directional tires, the rotation pattern may be slightly different. Always consult your owner’s manual for the most accurate guidance based on your specific tires. When to Rotate the Tires on Your 2025 GMC Yukon To keep your 2025 GMC Yukon running smoothly, it’s important to rotate your tires regularly. Here’s what you need to know about the best times to rotate your tires and how often to follow the Yukon tire schedule. General Timing for Tire Rotation Every 6,000 to 8,000 miles: This is the typical interval for most vehicles, including your Yukon. Check your owner’s manual: For exact recommendations based on driving conditions and tire type. Factors that Affect Rotation Frequency Driving habits: Frequent long trips or heavy loads may require more frequent rotations. Tire wear: If you notice uneven tire wear, you may need to rotate them sooner. Regular Maintenance Stay on top of your tire rotation Yukon to help extend the life of your tires. Regular rotations ensure even tire wear and better overall vehicle performance. By sticking to a regular tire rotation schedule, you’ll ensure that your rotate tires GMC Yukon 2025 at the right intervals. Check your Yukon tire schedule for the best maintenance plan based on your driving habits. Important Factors to Know About Your Tires Understanding the different tire types and how they affect your tire rotation can help you maintain your 2025 GMC Yukon. It’s important to follow the proper Yukon tire schedule to ensure your tires wear evenly and last longer. Types of Tires All-Season Tires: Designed to perform in a variety of conditions. Most common and easy to maintain. All-Terrain Tires: Best for off-road driving. These can wear unevenly if not rotated regularly. Winter Tires: Provide better traction in cold, snowy conditions. They should be rotated according to your vehicle's needs. Common Rotation Patterns Front-to-Rear Pattern: This is the most common pattern for tire rotation Yukon. It involves swapping the front tires to the rear and vice versa. X-Pattern: This pattern is often used for vehicles with non-directional tires. It crosses the tires from side to side. Side-to-Side Rotation: Used for vehicles with staggered tire setups or different-sized tires on the front and rear axles. Why Rotation Pattern Matters Even Wear: Different tire types can wear unevenly. A proper rotate tires GMC Yukon 2025 schedule helps prevent this. Longevity: Following the right rotation pattern can extend the life of your tires and improve vehicle safety. Before rotating your tires, always check your Yukon tire schedule for manufacturer-specific recommendations. This will help you choose the best tire rotation pattern for your driving habits. How to Maintain Your Tire Pressure After a Rotation After you rotate tires GMC Yukon 2025, it’s essential to check and maintain the correct tire pressure. Proper tire pressure ensures your vehicle runs smoothly, efficiently, and safely. Why Tire Pressure Matters Improved Fuel Efficiency: Proper tire pressure reduces rolling resistance, improving your vehicle’s fuel economy. Better Tire Wear: Maintaining the right pressure helps prevent uneven wear, extending the life of your tires. Safety: Correct tire pressure ensures better grip and handling, especially in wet or snowy conditions. How to Check Tire Pressure Use a Tire Pressure Gauge: Check each tire individually after rotation. Compare to Manufacturer's Recommended Pressure: You’ll find this information in your Yukon tire schedule or on the inside of the driver's door. Do It When Tires Are Cold: Tire pressure can increase when tires are hot from driving, so it’s best to check when they are cool. Tips for Maintaining Tire Pressure Check Regularly: Make tire pressure checks a part of your routine, especially after a tire rotation Yukon. Adjust When Needed: Add air if the pressure is too low or release some if it’s too high. Replace Faulty Valve Stems: If the valve stem is damaged, air can leak out, causing tire pressure issues. Maintaining proper tire pressure after a tire rotation helps ensure your 2025 GMC Yukon runs at its best. Always follow the Yukon tire schedule for regular checks to keep your tires in top shape. Does the large size of the 2025 GMC Yukon require special equipment for tire rotation? No, the large size of the 2025 GMC Yukon does not require any special equipment for tire rotation. Standard tools and equipment, such as a hydraulic jack and a torque wrench, are typically sufficient for the job. How can towing or off-roading influence my Yukon’s rotation schedule? Towing or off-roading can put extra strain on your tires, leading to uneven wear. As a result, your Yukon tire schedule may need to be adjusted, with more frequent tire rotations recommended. It’s a good idea to rotate tires every 5,000 to 7,500 miles if you frequently tow or off-road. Are tire rotations covered by warranty or maintenance plans? Tire rotations are typically covered by a maintenance plan, but not always by the vehicle warranty itself. It’s important to check with your dealership to see if tire rotations are included in your Yukon’s specific plan or warranty. These answers should provide you with the key details needed to keep your vehicle in optimal condition. If you have more specific questions or need clarification, don’t hesitate to reach out! Keep Your GMC Yukon on the Road at Phillips Buick GMC At Phillips Buick GMC, we’re here to help you keep your 2025 GMC Yukon in top condition. If you need more information on how to rotate the tires on your Yukon, don’t hesitate to contact us for assistance. Our team can guide you through the process or provide the necessary service to ensure your vehicle is ready for the road. We also invite residents from Leesburg, Yalaha, Rutland, Haines Creek, and Weirsdale to explore our wide selection of vehicles, including the 2025 GMC Yukon. Whether you're looking for a family-friendly SUV or a truck for tough tasks, we have something for everyone. As you continue exploring, be sure to check out some of our other helpful resources. Our guide on Buick Error Response Codes provides insights into troubleshooting, while our post on Seating Capacities in the 2025 GMC Lineup helps you find the perfect fit for your family. If you're in the market for a pre-owned vehicle, our blog about what to look for when buying a used truck is a must-read. For more details on tire maintenance and to schedule a service appointment, visit our Tires Page here. We look forward to assisting you!

2025 GMC Sierra EV Denali Truck driving on a highway through the mountains

How to Rotate the Tires on Your 2025 GMC Sierra EV

Keeping your 2025 GMC Sierra EV running at its best isn't just about high-tech batteries and cutting-edge design — it also comes down to something as simple as regular tire rotations. Whether you're cruising through Leesburg or heading out toward Weirsdale, making sure your tires wear evenly is key to maximizing performance, safety, and the life of your tires. If you're wondering how to rotate the tires on your 2025 GMC Sierra EV, you're in the right place. In this guide, we'll walk you through everything you need to know, from the basics to tips tailored for EVs. And if you prefer a professional touch, the team at Phillips Buick GMC is always ready to help. Feel free to stop by or contact us today — your Sierra EV deserves expert care every mile of the way. What Tools Do You Need to Rotate Your Sierra EV's Tires? Before you rotate tires on your GMC Sierra EV 2025, it’s smart to have the right tools close by. A smooth and safe GMC Sierra EV tire rotation starts with the right gear. Here’s a simple list to get you set up: Jack and Jack Stands: You need a strong jack that can lift the weight of your Sierra EV. Always use jack stands to hold the truck in place. Torque Wrench: A torque wrench makes sure you tighten your GMC Sierra EV tire bolts just right. Too loose or too tight can cause damage. Socket Set: Most 2025 GMC Sierra EV models need a socket set to fit the lug nuts. Check your owner's guide for the right size. Wheel Chocks: Put these behind your tires to keep your Sierra EV from moving while you work. Work Gloves: Gloves keep your hands clean and safe during your GMC Sierra EV tire rotation. Tire Pressure Gauge: After you rotate, check your tire pressure. Driving in places like Leesburg or Yalaha means tire health matters even more. Having the right tools makes it easier to care for your Sierra EV and helps keep you safe while you work. Step-by-Step Guide: How to Rotate the Tires on Your 2025 GMC Sierra EV Ready to rotate tires on your GMC Sierra EV 2025? Follow this simple step-by-step guide to do it the right way. Taking care of your GMC Sierra EV tire rotation at home can save you time and money. Here’s how to get it done: 1. Park on Flat Ground Find a flat, solid place to park your Sierra EV. Set the brake and put wheel chocks in place. 2. Loosen the Lug Nuts Use your socket wrench to loosen each nut on the GMC Sierra EV tires. Do not take them off yet. 3. Lift the Vehicle Place your jack in the right spot under the frame. Lift the truck and set it on jack stands. 4. Remove the Tires Take off each tire one at a time. Lay them flat to keep them safe. 5. Switch the Tires Move the front tires to the rear. Cross the rear tires to the front. This pattern works best for most trucks. 6. Put the Tires Back On Line up each GMC Sierra EV tire with the bolts. Hand-tighten the lug nuts. 7. Lower the Vehicle Use your jack to lift and remove the stands. Lower your Sierra EV slowly to the ground. 8. Tighten the Lug Nuts Tighten each nut with a torque wrench to the level shown in your owner's guide. 9. Check Tire Pressure After the GMC Sierra EV tire rotation, check the air pressure. Fill as needed. Why Regular Tire Rotations Matter for Your 2025 GMC Sierra EV Keeping your Sierra EV in top shape takes more than just good looks and smooth rides. It also means giving your tires the care they need. One of the best ways to do that is to rotate tires on your GMC Sierra EV 2025 on a steady schedule. Here’s why regular care matters: Even Tire Wear: A good GMC Sierra EV tire rotation helps your tires wear the same way. This helps them last longer and drive better. Better Ride: When you rotate tires on your GMC Sierra EV 2025, you help keep the ride smooth and safe. Uneven tires can cause bumps, noise, and even less control. Boosts Safety: Worn-out spots can lower grip, which can be a real risk in rain. A fresh GMC Sierra EV tire surface gives you the best hold on the road. Saves You Money: Tires that last longer mean fewer trips to the shop. A small job like a GMC Sierra EV tire rotation can save big money over time. Protects EV Systems: Your Sierra EV uses smart tech like regen brakes. Worn or uneven tires can hurt these systems and make them work too hard. Helps with Warranty: Many tire brands want proof you rotate your tires. A missed GMC Sierra EV tire rotation could cost you if a tire fails early. The roads around Leesburg, Yalaha, and Rutland can be rough on tires. With steady care, your Sierra EV will stay ready for every trip. If you’re not sure when your tires need a switch, Phillips Buick GMC is here to help. Stop by anytime or give us a call. How Often Should You Rotate the Tires on a 2025 GMC Sierra EV? Regular tire rotations are key to getting the most out of your 2025 GMC Sierra EV. But how often should you rotate your GMC Sierra EV tires? The answer depends on a few factors, including the type of driving you do and the road conditions around Haines Creek or Weirsdale. Here’s what you need to know: Every 6,000 to 8,000 Miles: For most drivers, the best rule of thumb is to rotate tires on your GMC Sierra EV 2025 every 6,000 to 8,000 miles. This keeps the wear balanced and helps your tires last longer. Check Your Owner’s Manual: Your Sierra EV might have different needs based on the model or tire brand. Always check your owner’s manual for exact timing. If You Drive on Rough Roads: If your daily drive includes rough, gravel, or hilly roads around Yalaha, your tires might wear unevenly faster. In that case, you may want to rotate your GMC Sierra EV tire more often. Every Time You Service Your Vehicle: If you’re having other maintenance done, like oil changes or brake checks, it’s a great time to ask about your GMC Sierra EV tire rotation. Electric Vehicle Considerations: Since the Sierra EV is an electric truck, tire wear can be affected by the extra weight and torque from the battery. Regular rotations help maintain optimal tire performance. Rotating your tires regularly helps you get the most out of your Sierra EV and reduces the chances of having to replace them too soon. For precise recommendations and service, stop by Phillips Buick GMC — we’re here to help you keep your truck running smoothly. Mistakes to Avoid When Rotating Your Tires Doing a GMC Sierra EV tire rotation at home can save you money. But making a mistake could hurt your truck. To keep your Sierra EV safe, watch out for these common errors: Skipping the Tire Pattern: The rotate tires GMC Sierra EV 2025 guide has a set pattern. Do not swap the wrong tires or you can cause bad wear. Not Checking Tire Pressure: After you move your GMC Sierra EV tires, check the pressure. Each tire should match the right PSI level. Ignoring Tire Wear: Look at each GMC Sierra EV tire for damage or low tread. Rotating bad tires can be a safety risk. Wrong Lug Nut Tightness: Using the wrong torque can cause a wheel to fall off. Always use a torque wrench after you rotate. Forgetting to Recheck After Driving: After 50 miles, check your lug nuts again. They can shift as you drive around Leesburg or Yalaha. Taking the time to avoid these mistakes can make your Sierra EV safer and your tires last longer. Should You Rotate Tires on Your GMC Sierra EV Yourself or Visit a Dealership? Doing a GMC Sierra EV tire rotation at home can seem like a smart way to save time and money. But is it the best choice? It depends on your tools, skill, and time. Here are some things to think about: Skill Level Needed: To rotate tires GMC Sierra EV 2025 right, you must know the right tire pattern. Mistakes can cause fast wear. Tools You Must Have: You need a jack, jack stands, torque wrench, and chocks. Without them, working on your Sierra EV can be unsafe. Time and Effort: Doing a full GMC Sierra EV tire rotation can take an hour or more. A pro can do it fast and right. Safety Risks: If the truck is not lifted right, it can fall. This can hurt you and your GMC Sierra EV tires. Perks of a Dealership Visit: At Phillips Buick GMC, our techs know your Sierra EV inside and out. We check more than just the tires, so you leave safe and ready for the road. Choosing to rotate your tires at home or with us is up to you. If you want peace of mind, visit our team near Leesburg, Yalaha, Rutland, Haines Creek, or Weirsdale. We’re here to help your 2025 GMC Sierra EV stay in top shape. What rotation pattern is recommended for dually or special wheel configurations? For vehicles with dual rear wheels (dually), the recommended rotation pattern is typically a cross pattern, where the front tires move to the rear on the opposite side, and vice versa. However, it's best to consult your vehicle's manual or a professional to ensure the pattern matches your vehicle's specific needs. Can I rotate the tires myself, or is professional help advised for heavier vehicles? While it is possible to rotate tires on your own, heavier vehicles like the GMC Sierra EV can be more difficult to manage. It's advised to seek professional help, especially if you're not experienced with handling the weight and ensuring the vehicle is properly lifted and stabilized. Professional mechanics also ensure the right rotation pattern is followed, which can help extend tire life. Do EV trucks use different tires from normal trucks? Yes, EV trucks like the GMC Sierra EV often use tires designed for electric vehicles. These tires are built to handle the additional weight of the battery pack, offer lower rolling resistance for improved efficiency, and manage the instant torque electric motors deliver. Make sure to choose tires specifically designed for your Sierra EV to ensure optimal performance and safety. Explore the 2025 GMC Sierra EV and Expert Maintenance Tips Maintaining your 2025 GMC Sierra EV is key to keeping it running smoothly and safely. If you ever need more information on tire care or vehicle maintenance, Phillips Buick GMC is here to help. Whether you need assistance with tire rotation or want to learn more about your vehicle's performance, our knowledgeable team is ready to support you. If you're from Leesburg, Yalaha, Rutland, Haines Creek, or Weirsdale, we invite you to explore our wide selection of vehicles, including the Sierra EV. From innovative features to top-notch performance, the Sierra EV is built for those who want power, efficiency, and style. We also offer helpful resources, like tips on what tire pressure should be for your GMC and why your GMC might be pulling to the side. If you ever wonder why your GMC won’t start, we have answers for that too. Feel free to explore these articles to keep your ride in tip-top shape. Visit us to check out our Sierra EV models and learn more about tire maintenance. We’re ready to help you get the most out of your vehicle.

Contact Us

Fill out this form below and we'll contact you shortly
*Required Fields